
Today, there are several ways in which a cyber-criminal can harm your site. In fact, according to a report by Wordfence, around 90,000 cyber-attacks happen on WordPress websites every minute. If you do not want your WordPress website to become vulnerable to any of such attacks, you need a service that could act as a shield against these malicious activities. Cloudflare is one such solution. Once you know how to set up Cloudflare, you can easily secure your website and boost its speed to perform better.
In this article, we will discuss:
- What is Cloudflare, and what are its benefits?
- How to integrate Cloudflare to optimize your WordPress website?
- The steps to configure the official Cloudflare plugin
What is Cloudflare, and how has it become so popular?
Cloudflare, Inc. is an American website security company that provides free Content Delivery Network (CDN) services, Domain Name System (DNS) services, and DDoS mitigation services. Apart from security services, it is an industry leader that deals with web performance and edge computing with data centers in more than 200 cities around the globe. Once you use the Cloudflare plugin for WordPress, its CDN services will speed up your site, and SSL, along with DDoS protection features, will help secure it.
Got confused with all these tech terms? Don’t worry, we will make them all clear in a while.
But before that, you should know what Cloudflare actually is and how it evolved.
When does it all start?
In July 2009, Matthew Prince, Lee Holloway, and Michelle Zatlyn founded Cloudflare. All three of them had previously worked on Project Honey Pot, an open-source project that focused on monitoring internet frauds and abuses. Started as a simple application to identify the source of email spam, it traveled a long way to become one of the finest services that protect websites from all forms of cyber-attacks. Impressive, right?
What brings Cloudflare to light?
- In June 2009, Cloudflare received media attention while delivering the security services to the website of Lulz Security, a black hat hacking group. However, there was a great irony in this case. Cloudflare, a website protection company, mitigates a DDoS attack on Lulzsec, a hacking group that claimed responsibility for many high-profile cyber attacks. Securing unethical hackers from being hacked made this case controversial and brought Cloudflare into the limelight.
- In March 2013, the company protected The Spamhaus Project (an international organization to track email spammers and spam-related activities) from a DDoS attack that exceeded 300 Gigabits per second. Akamai Technologies (a US-based CDN, cyber-security, and cloud service company) chief architect stated that it was the largest publicly known DDoS attack in the history of the internet at that time.
- In February 2014, Cloudflare mitigated a DDoS attack that peaked at 400 Gbit/s against an undisclosed customer. In November of the same year, the company reported another massive DDoS attack against independent media sites, targeted at 500 Gbit/s.
- One of the recent DDoS attacks reported and absorbed by Cloudflare happened in June 2020 and peaked at around 754 million packets per second.
Some of Cloudflare’s popular projects
- Cloudflare launched a project named ‘Galileo’ in 2014 that provides free services to secure artists, journalists, activists, and human rights groups from cyber-crimes. As of 2020, more than 1000 users and organizations were a part of Project Galileo.
- In 2017, Cloudflare introduced the Athenian Project to ensure the free security of online election bodies of local and state governments, including domestic and foreign political campaigns.
- On the 1st of April, 2019, Cloudflare declared a freemium VPN (Virtual Private Network) service named WARP. The company released WARP for public access on the 25th of September 2019.
- As of 2020, Cloudflare gives DNS services to over 100,000 customers and covers over 25 million internet properties.
- In January 2021, Cloudflare initiated the Project Fair Shot, a free tool that allows global health organizations to manage a digital queue for COVID-19 vaccinations.
From all these achievements, you might get an idea of what makes Cloudflare one of the leading web security industries worldwide. Now, what about understanding how to use Cloudflare with WordPress websites? If you are searching for an answer, then you are certainly in the right place. But before that, let’s discuss the benefits you can get from Cloudflare.
Benefits of Cloudflare for your WordPress website
Do you know, more than 7.5 million websites on the internet are using Cloudflare services? Moreover, as per Cloudflare, a website using Cloudflare loads two times faster than those not using it, has 65% fewer requests, uses 60% less bandwidth, and is more secure. Isn’t it great?
A visionary product owner always wishes to know what good it has for them. So here are some advantages of the Cloudflare WordPress plugin. Also, as we promised, we will discuss the terms we have mentioned in the introduction to Cloudflare. Here they are:
CDN Services
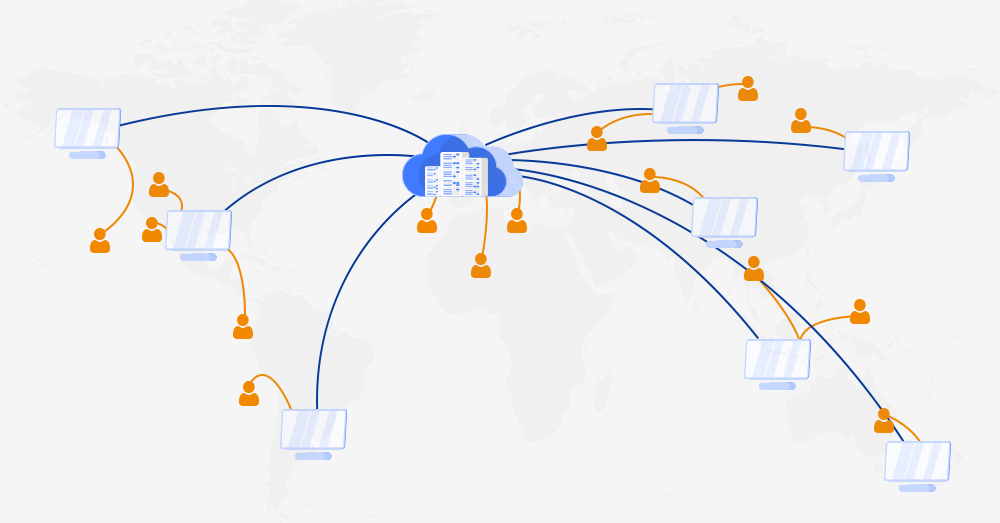
CDN is an acronym for Content Delivery Network. It refers to a geographically distributed cluster of servers that work together to provide fast delivery of internet content to the users. Cloudflare offers ultra-fast CDN services over their global edge network to speed up your website so that your users can get access to your site’s content in no time.
Know More: Best Ways to set up CDN
SSL Certification
SSL stands for Secure Sockets Layer. Secure Sockets Layer is crucial to secure your website, even if it does not contain sensitive company data or users’ information. Do not worry if your WordPress website does not have an SSL certification. You just need to know how to set up Cloudflare into your website, and the rest will get managed. It can provide you a free shared SSL certificate and help you get a green padlock in visitors’ browsers to protect the traffic on your WordPress website.

DNS Services
DNS (or Domain Name Server) is responsible for translating domain names into IP addresses. Therefore, when a user searches for a website, a search engine can locate its IP address and load its content quickly and efficiently. The best Cloudflare settings for WordPress will provide you with fast, flexible, and secure DNS services for your website.
DDoS Protection
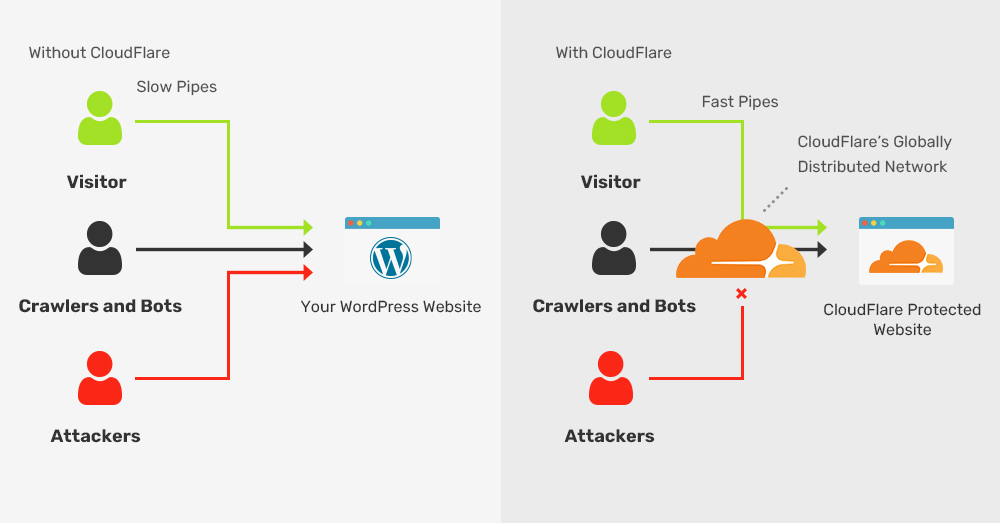
It is one of the best features of Cloudflare a user can have. A DDoS (or Distributed Denial of Service) attack is a kind of cyber-criminal activity that overloads your website with multiple user requests exceeding its limit to handle them. These requests are nothing but the traffic that visits your website. When this traffic comes beyond the limit, it can lead to a website crash or make it extremely slow to hamper or prevent your users from accessing your website. However, Cloudflare filters out the malicious traffic without compromising the performance of the legitimate traffic.

Other performance-wise benefits
Cloudflare provides some more features that can help in the optimization of your WordPress website. For example, the Cloudflare plugin for WordPress can help you minimize the code, enabling Brotli compression (compressing large-size files into suitable sizes), etc. You can also set up custom security rules for specific parts of your website, such as the WordPress dashboard.
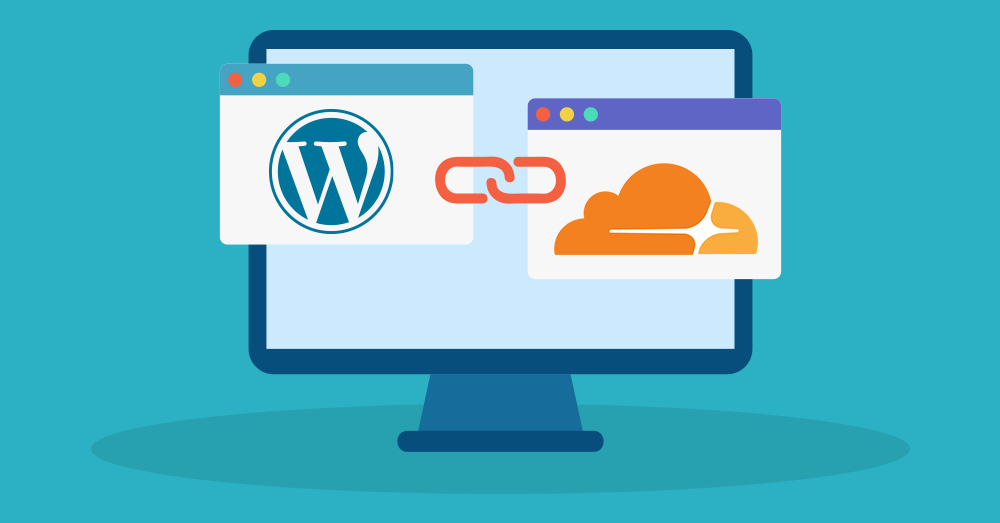
Methods to set up Cloudflare for WordPress
After reading the above section, you might be excited about the benefits you can have with Cloudflare services. And you know what’s the best thing about it, most of these services are free of cost.
But, before you can access them, you need to connect your WordPress website to Cloudflare. For that, you need to let Cloudflare manage your domain’s nameservers for it to serve cached content from its CDN and filter out the malicious traffic with its security features.
So, there are two methods to set up Cloudflare into your WordPress site and changing its domain’s name server to Cloudflare. Let’s look at both of these methods one by one.
How to set up Cloudflare for WordPress
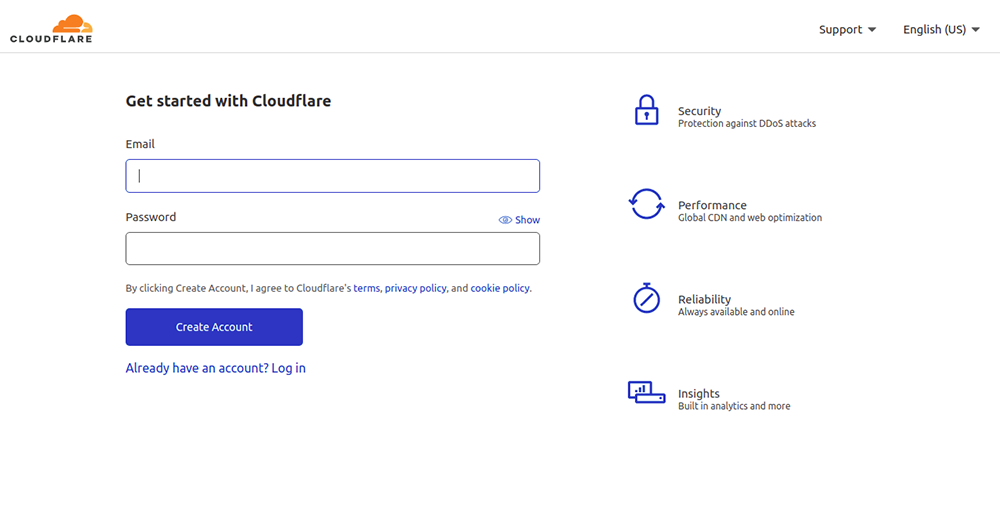
Step 1: Make a free Cloudflare account.
- To start setting up Cloudflare into your WordPress website, head to the Cloudflare official website and sign up.
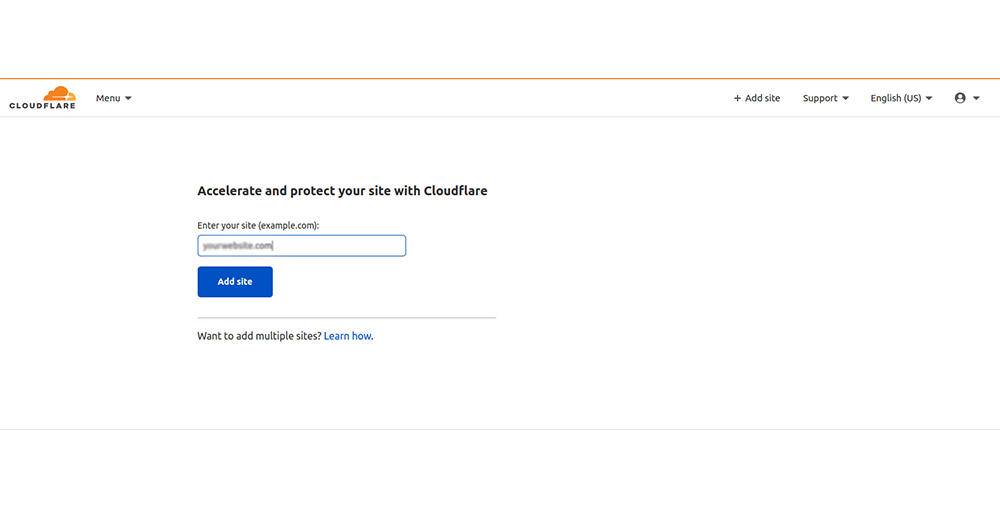
- Enter the domain name of your WordPress website that you want to connect with Cloudflare and click on the Add Site option.
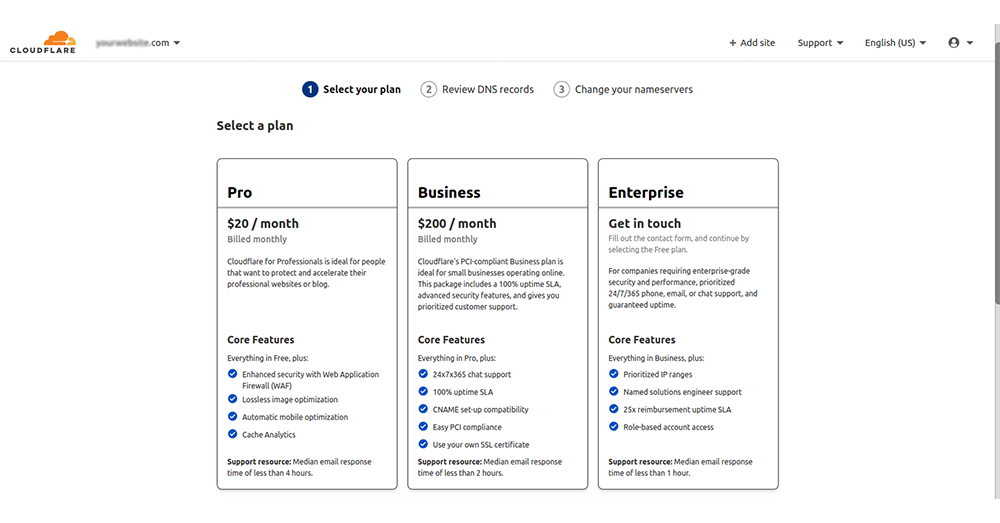
- In the next step, you will need to choose a Cloudflare plan as per your requirements. For the time being, you can select the free one as it contains most of the features a WordPress site needs.
Step 2: Verify DNS Records
- After you choose a specific plan, Cloudflare will scan the DNS records available on your website.
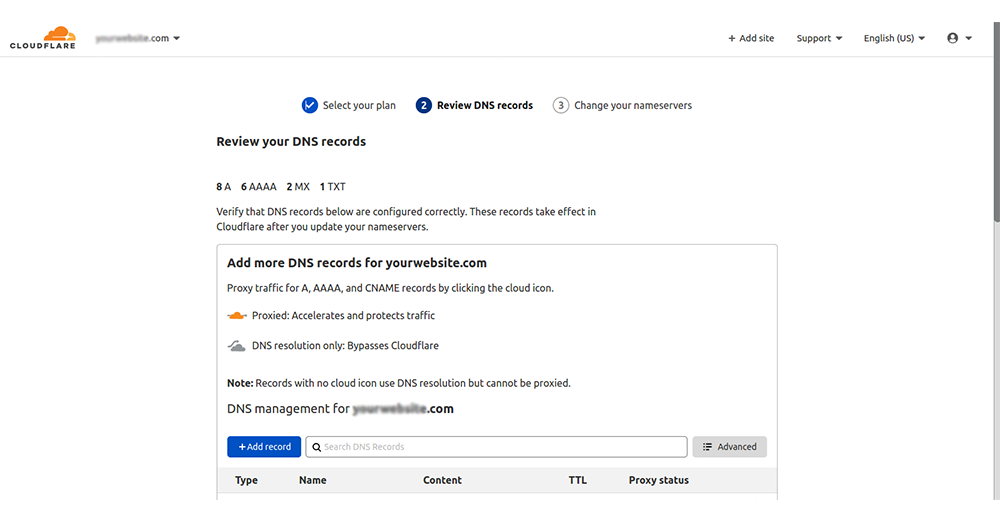
- Make sure you see an orange cloud beside your main domain name. Click on the Continue button.
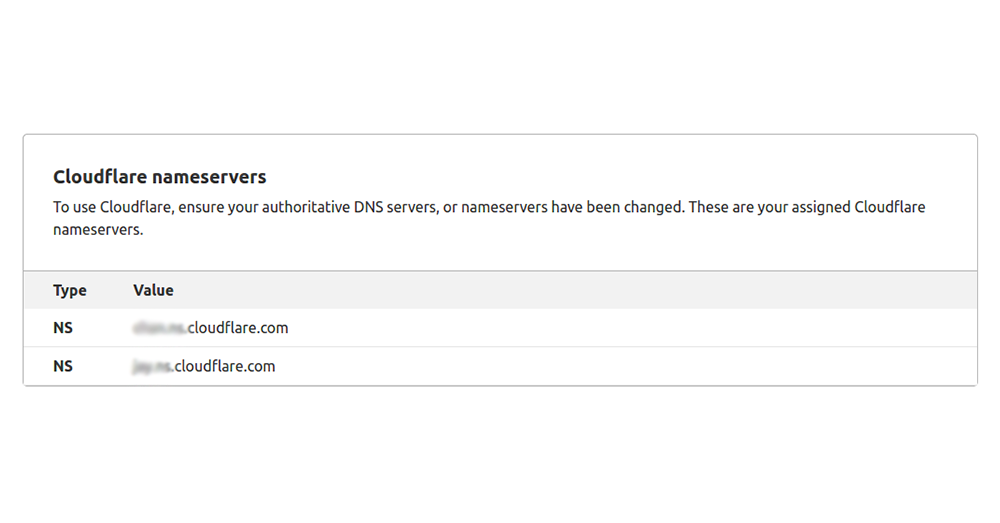
Step 3: Update your nameserver with Cloudflare
- Now, Cloudflare will provide you with a new set of nameservers. Replace these with the existing nameservers.
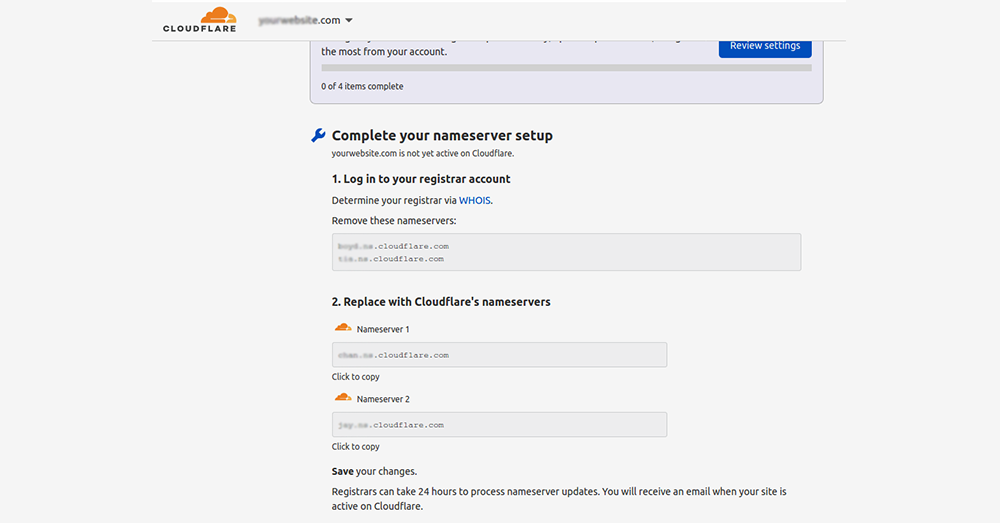
For your knowledge, nameservers are responsible for connecting your domain name to the web hosting you are using.
- When you switch your existing nameservers with Cloudflare’s, it will be able to redirect your traffic to your site.
- The way you will change your nameservers will depend on which domain name you have registered your website with. Some of the common domain registrars are:
- GoDaddy
- OVH
- Namecheap
- Whois
- Bluehost
Here our domain registrar is Whois.
- Once you change your domain’s nameservers, head back to Cloudflare’s interface.
- Click on the Done button and check the nameservers option.
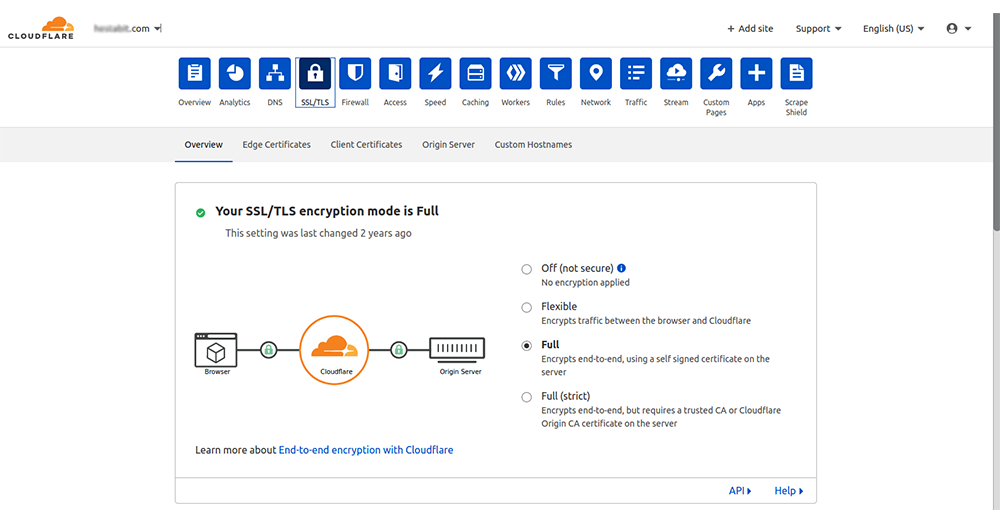
Step 4: Configure the basic settings.
- Now, you can configure some basic settings according to which Cloudflare will function for your WordPress site.
For example, to set up security configurations for your WordPress website, you can use SSL/TLS encryption and select the Full option. It will provide a green padlock in the visitors’ browser when they access your site and secure the traffic coming to your site.
Similarly, to optimize our site speed, you can go for Minification and Brotli compression. Minification will help in shrinking the size of your code. Brotli is a server-level compression technique to optimize large-size files, specifically images.
- When you finish configuring the best Cloudflare settings for WordPress, click on the Done button.
Step 5: Verify that your Cloudflare connection is complete.
- It is the final step in which the system might ask you to complete your nameserver setup.
- It can take up to 24 hours for the nameservers to get updated. So, if you see the message to complete your nameserver setup repeatedly for a few hours, don’t panic; it is normal.
- Wait for 30 minutes or a little more, and then click on the Re-check now button to see whether the nameservers have updated or not.
- Once the update process completes, you will see a success message like this: ‘Great News! Cloudflare is now protecting your site.’
And that’s all! Now, you know how to use Cloudflare with WordPress to protect and optimize your website.
How to make configurations for the official Cloudflare WordPress plugin?
It is the optional method to integrate Cloudflare with WordPress. Although you can access many of Cloudflare’s features through its dashboard, this official Cloudflare plugin can make things easier for you. Two of the primary benefits of using the Cloudflare WordPress plugin are:
- It automatically configures most of the crucial settings by itself that would be best for your WordPress site.
- With it, you can manage most of the things from your WordPress dashboard instead of using the Cloudflare website.
Here are the steps to set up Cloudflare plugin with your WordPress site:
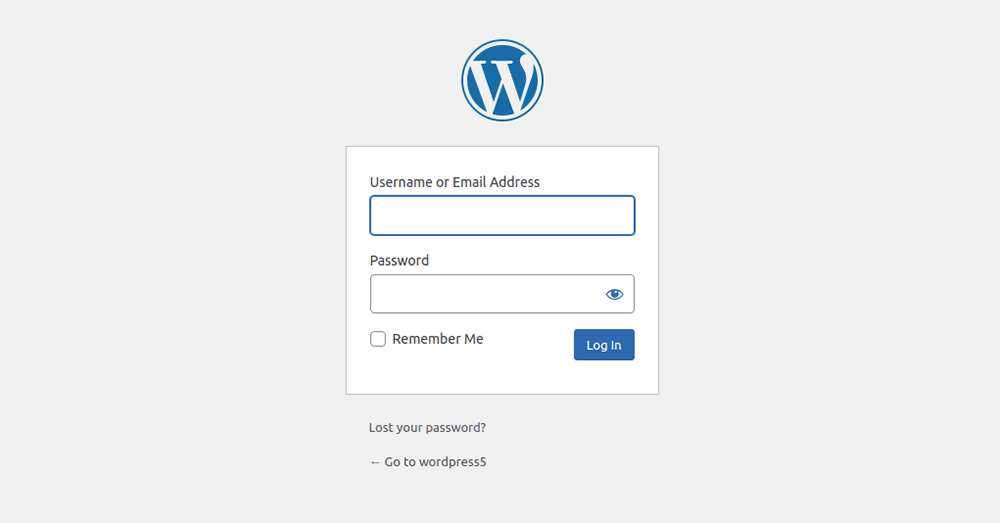
Step 1: Log in to your WordPress admin page.
Enter the login credentials and sign in to your WordPress admin page.
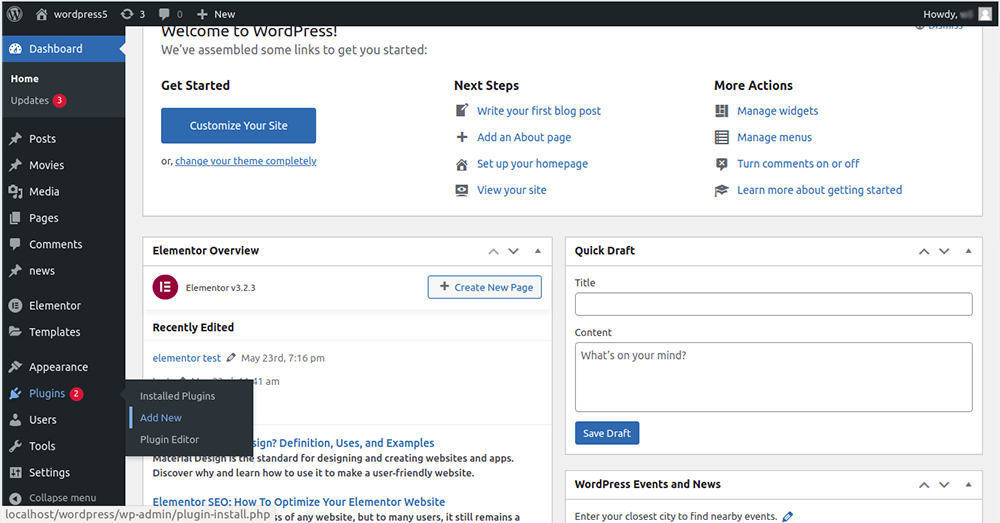
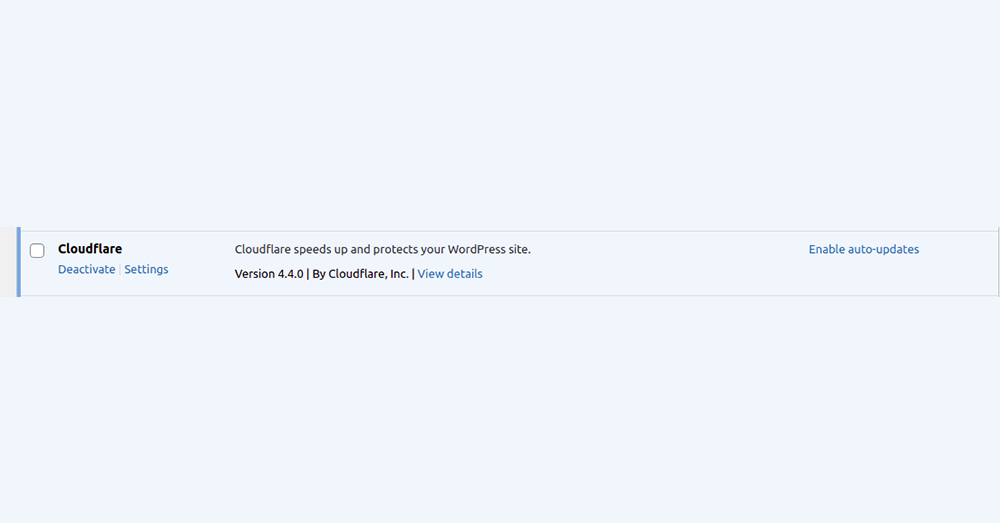
Step 2: Add and Install the Cloudflare plugin
You can find the official Cloudflare plugin at WordPress.org. To add a new plugin, click on the Plugin option available in your WordPress dashboard, and select Add New. Then search for ‘Cloudflare’ in your WordPress dashboard and install it.
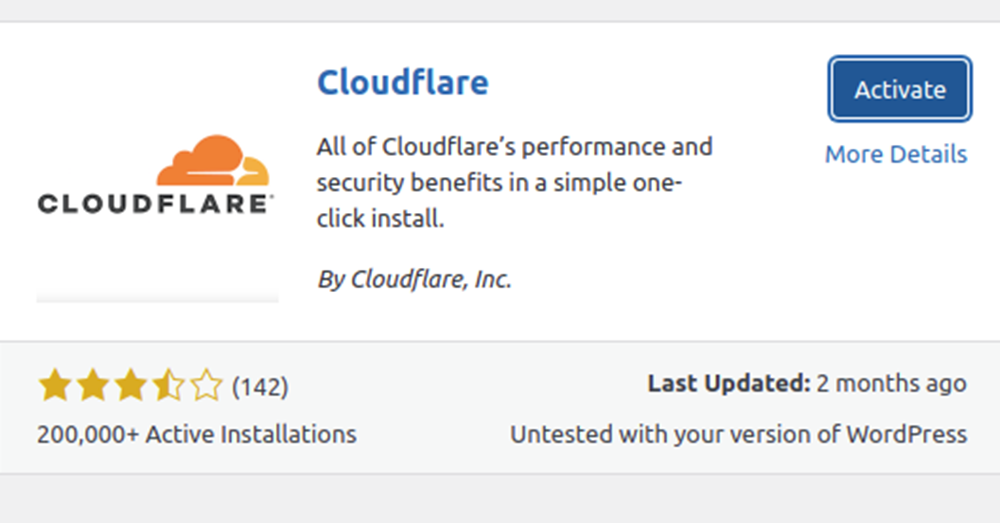
Step 3: Activate the plugin.
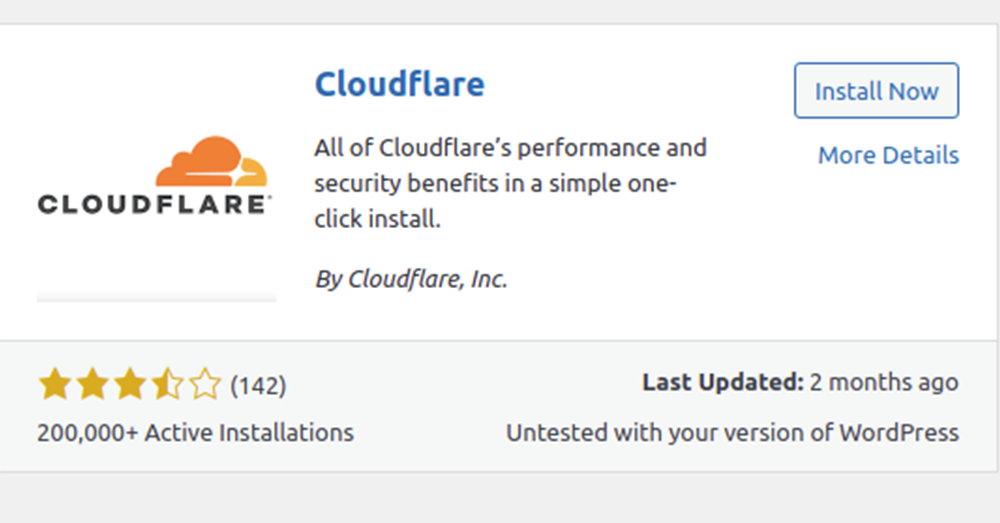
Once the installation of the Cloudflare plugin is complete, click on the Activate button.
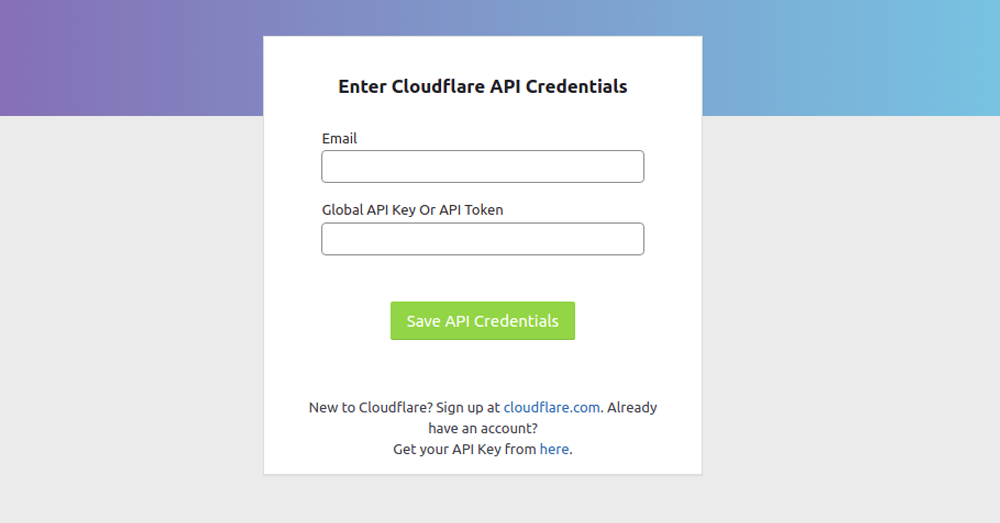
Step 4: Connect to your Cloudflare account.
Now, click on the Settings option followed by Cloudflare. Click on the Sign in here Option to log in to your Cloudflare account. You need to enter the email address with which you have created your Cloudflare account along with the API key. Then, tap on the Save API Credentials button.
Note: To find your Cloudflare key, follow the steps mentioned below:
- Go to your Cloudflare dashboard.
- Select your account icon available on the top-right corner.
- Click on My Profile.
- In the next step, click on the API Tokens tab.
- Now, under the API Keys heading, you will find your Global API Key. Click on the View button to see your API key. You might need to enter a password to view it. You can copy the value given in the API Key and enter it while configuring your Cloudflare plugin.
Step 5: Optimize the Cloudflare settings for your WordPress site.
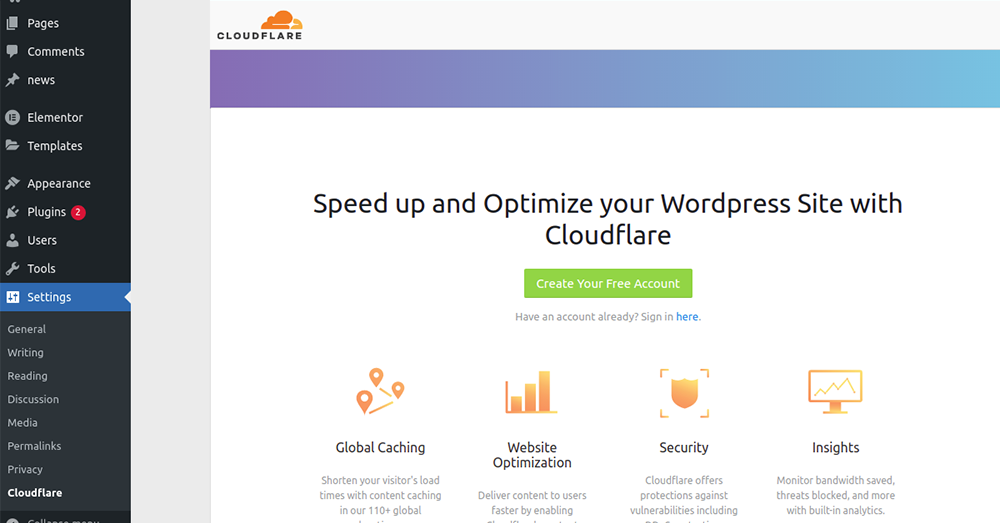
Once you link the official Cloudflare plugin to your site, you will see the Optimize Cloudflare for WordPress option. Click on the Apply Button to automatically optimize the best Cloudflare settings for WordPress.
And that’s it! In this way, you can successfully set up the official Cloudflare plugin for your WordPress site.
Wrapping up
If you have made it to this point, you might have become familiar with Cloudflare and its exciting features to secure and optimize your WordPress website. The best thing about the Cloudflare services is that for most of them, you do not need to spend a single penny which you might not get with other companies. The methods mentioned in this article can help you set up Cloudflare for your site, and if you still face any trouble, you can, of course, hire WordPress experts to set it up for you.