Slower websites are a big NO for search engine rankings, SEO, and overall user experience. As per Google, the ideal time for a site to load with all its content should be less than 1 second. Neither Google nor the users like sites that take more than 3 seconds to turn up. However, when a website has an abundance of graphics, high-quality images, videos, etc., it can increase its load. As a result, your visitors (specifically from other parts of the world) can experience a delay in accessing your website. This is where a WordPress CDN plays its role. But what is CDN, and how to set up CDN services into your WordPress website?
This article will tell you about the CDN services and their benefits. Along with that, we will also discuss the different methods to integrate CDN services into your WordPress website.
What is CDN, and how does it work?
CDN stands for Content Delivery Network. As the name suggests, it is a cluster of geographically distributed servers and data centers that help provide internet content to users with minimum delay. The primary goal is to deliver high availability and performance by dispensing the services relative to the end-users. CDN is an umbrella term covering several content delivery services, such as video streaming, web, and mobile content acceleration, load balancing, transparent caching, cloud intelligence services, etc.
How does a CDN work?
The primary working principle behind a WordPress CDN is to minimize the physical distance between users and the web or application server. This helps bring the content closer to the users’ geographical locations to reduce the latency with the help of strategically located data centers known as POPs (Points of Presence).
Let’s understand this process through an example. You might be aware of Amazon – the largest business and tech giant in the world. The company has a wide range of products and services and have delivery options worldwide. In normal circumstances, there are very few orders that do not deliver timely. But have you ever wondered how every time they provide order on or even before time, no matter where your location is?
The reason for this is that Amazon has many sellers and delivery agents located at different places. When you place an order, the system checks for your location and finds the nearest seller. After that, the logistics department takes charge of dispatching, packaging and shipping the order. Lastly, they pass your parcel to the nearest delivery agent to assure that you get the order on time. If the delivery agent is busy with previous orders, the system will assign another person to do the job. In the same way, CDN looks for the nearest data center (POP) to the user to deliver website content without any delay.
CDN also involves caching servers that maintain, store, and deliver the cached files to reduce bandwidth consumption and speed up the webpage loading time. However, it is practically impossible for a CDN to have a content caching server close to every user. Therefore, a CDN provider organizes the caches into POPs distributed throughout the globe.
When a user request turns up, a CDN redirects it to the user’s closest POP. Most of the CDN services perform this task by leveraging a technology known as GeoIP. GeoIP is like a large lookup table that plots IP addresses to geographic locations (countries, cities, etc.). When a user request appears, a CDN checks the table and directs the traffic to the nearest available server. That’s why it is beneficial for a business owner to learn how to use CDN for enhanced and on-time site content delivery.
Why should you use a CDN?
Do you know, as per research conducted by Strangeloop, a one-second delay in your website speed can lead to 11% fewer page views and 7% fewer conversions? Now you can imagine, being a product owner, it becomes crucial that your WordPress website content reaches the target audience on time. Furthermore, as already stated, a slow website can frustrate your customers, making them leave your website.
Content Delivery Networks help business owners deliver content straightaway to end-users. This speedy delivery of website content becomes possible by:
- Reducing latency
- Enhancing website performance
- Saving bandwidth
Another exciting feature of CDN is that it allows the edge servers to load content data in advance. Therefore, it ensures that the data delivered to the users is already present in all the CDN data centers (or POPs). Now, before knowing how to use CDN services, let’s first discuss the benefits of CDN for your WordPress website.
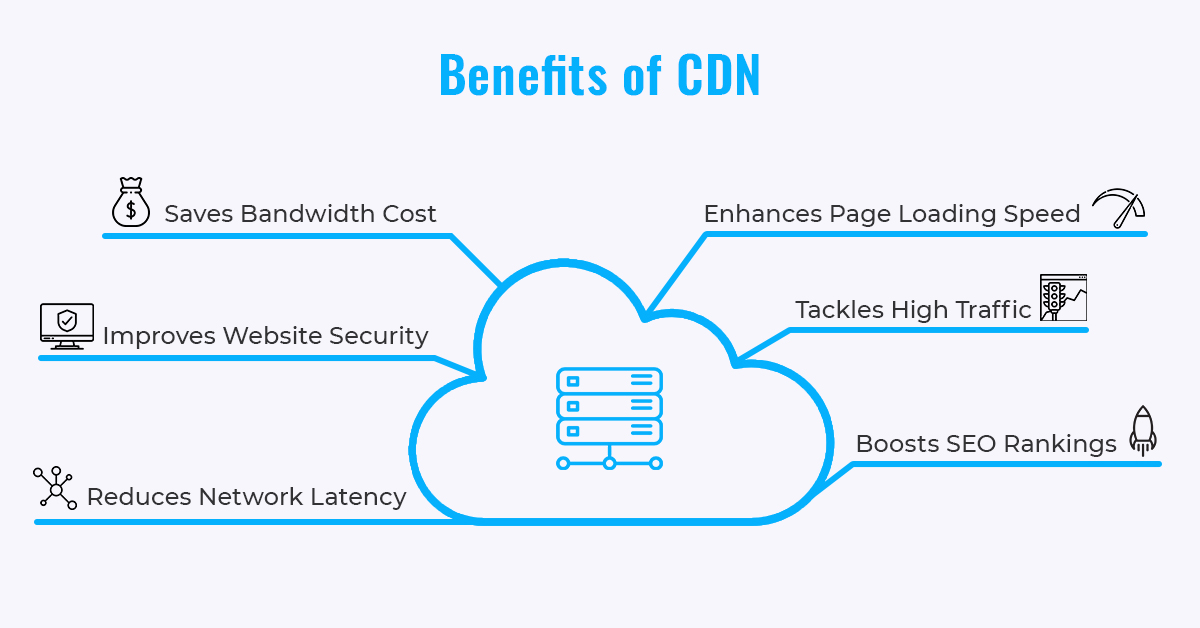
What are the benefits of CDN services for your WordPress website?
Enhancement in page loading time
Whether your visitors will stay or leave your WordPress website will majorly depend on how long your site takes to load its entire content. Using a neighboring CDN server allows web content distribution closer to your website users. As a result, your visitors experience faster webpage loading time.
Higher SEO rankings
Do you know, if a website takes more than 3 seconds to load, around 40% of the visitors will bounce away from it? It can not only harm your brand reputation but can also severely affect your website’s ranking on search engines like Google. Using a CDN can enhance your WordPress website speed, which helps in reducing the bounce rate. In addition, when your site content loads on time, hopefully, your visitors will spend more time on your website. Hence, knowing how to use CDN can help optimize your website and increase its search page rankings.
Reduces the bandwidth costs
When a web or application server responds to a DNS (Domain Name System) request, bandwidth consumption occurs. The bandwidth consumption cost is pretty high, and it can be an additional expense for businesses. However, with the help of caching and other optimization methods, CDNs can reduce the amount of data an origin server must provide. Thus, it helps in minimizing bandwidth consumption and hosting costs for business owners.
Reduces latency and increases content availability
A CDN serves cached content from several servers. Therefore, if one server is unavailable, the CDN will simply deliver your website data from a different server. As a result, there is negligible latency in content delivery. Therefore, when you know how to use a CDN in WordPress and subscribe to a CDN service, you can stay carefree.
Tackles high traffic
When your website receives high traffic volume, it can hold the network of CDN servers. However, the cached content is freely available for the end-user even when your website overloads with new requests. Therefore, CDN can prove to be beneficial in times of getting massive traffic on your website.
Improves website security
WordPress websites are prone to cyber-attacks, especially DDOS (Distributed Denial of Service) attacks. A DDoS attack is a malicious activity in which a cyber-attacker redirects multiple user requests to your website. When exceeding the limit up to which your website can handle them, these requests make it slower or even crash your site. As a result, your website can go through downtime, making it unavailable for your visitors to access it.
However, with a distributed network of data centers, a WordPress CDN helps spread the load equally across the total network capacity. When it happens, the chances of damage from a DDoS attack become extremely low. Therefore, CDN can be an effective tool to protect your WordPress website from such vulnerabilities.
Applications of CDN: Which businesses can benefit from it?
After reading the benefits of CDN mentioned above, it might be clear to you that CDN helps deliver a website’s content quickly and smoothly. Therefore, all the businesses dealing with content and information delivery can rely on CDN. Below are different types of companies and organizations for which CDN can be helpful. If your company comes in one of these sectors, you should know how to set up CDN into your WordPress website to get better results:
- E-Commerce industry: E-commerce websites having a massive range of customers all over the world.
- Media and Publications: Large news, media, and publication companies need to deliver crucial, up-to-date information to their readers in various countries.
- OTT Platforms/ Entertainment industry: Entertainment platforms such as Netflix, Amazon Prime, etc., offer HD web content in real-time.
- Social Media Networking: Social media networking websites and applications deliver interactive multimedia content to their users’ accounts’ feeds.
- Gaming industry: Gaming companies offer high-graphic, intensive gaming content to users located worldwide.
- Government and Finance sectors: Government agencies and financial sectors like banking institutions need a secure, fast, and reliable medium to deliver sensitive and vital information to the citizens.
Popular CDN service providers and their step-by-step setup process
Today, many companies offer CDN services and WordPress CDN plugins with different packages you can choose from. However, it is better to pick a service after properly researching your business requirements and the features you are looking for. Below are some of the most popular CDN providers available in the market.
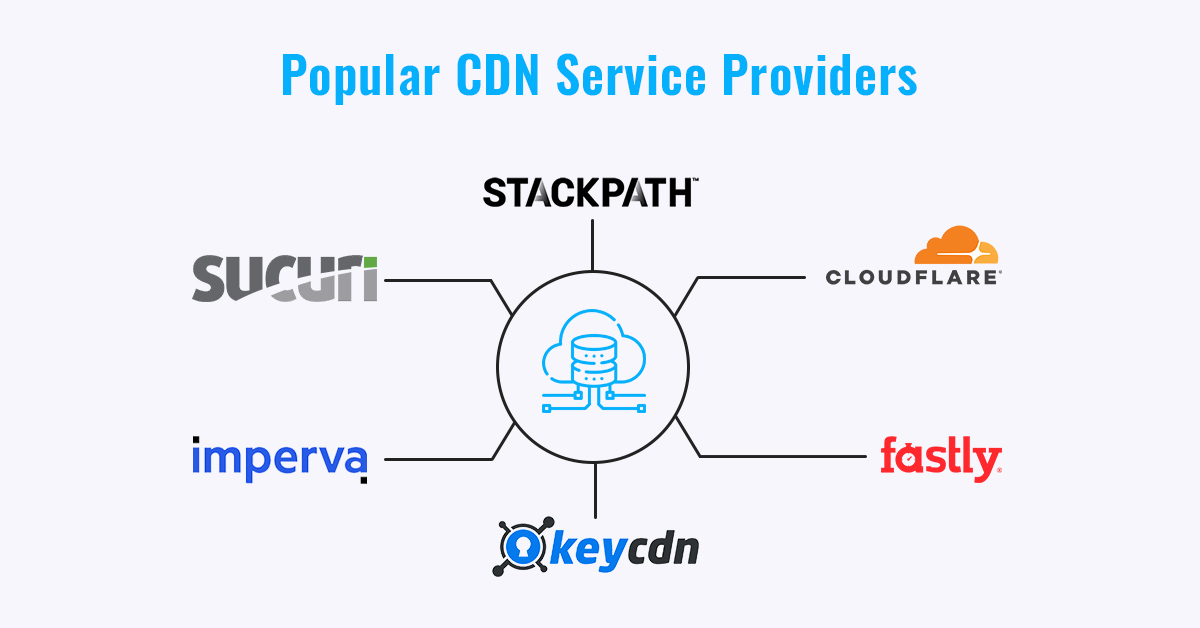
However, in this article, we will talk about the setup processes of the following four CDN providers, as they are high-performing ones and their integration process is relatively simple:
- Cloudflare
- KeyCDN
- Stackpath
- Sucuri
Let’s begin with the setup guide of Cloudflare CDN services.
Cloudflare CDN setup process
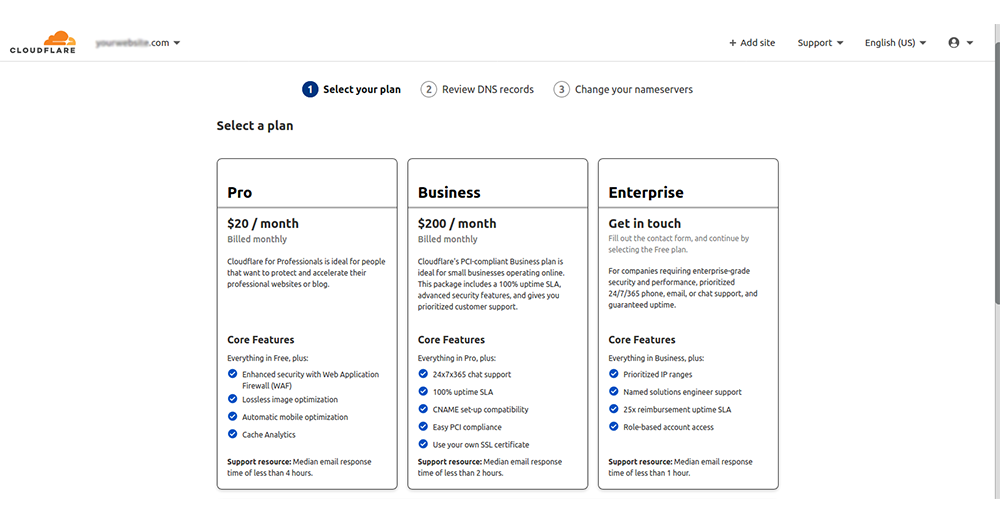
Cloudflare is one of the most popular CDN providers available out there. It is one of the top picks as it offers a free basic plan that’s pretty good for small businesses. Its paid plans start from $20 per month, which is also affordable. However, if you want to access all the top-class features of Cloudflare CDN services, you have to opt for a business plan that costs around $200 per month.
Now, to know how to use CDN in WordPress using Cloudflare, let’s follow this step-by-step tutorial given below:
Step 1: Head to the official website of Cloudflare and click on the Sign-Up link available on the top-right of your screen.
Step 2: Enter your email address and password, followed by clicking on the Create Account button.
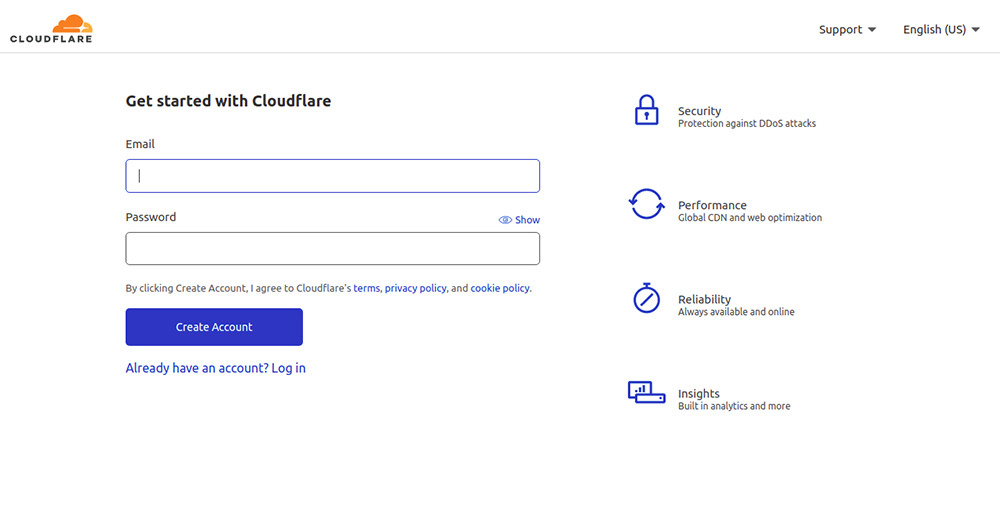
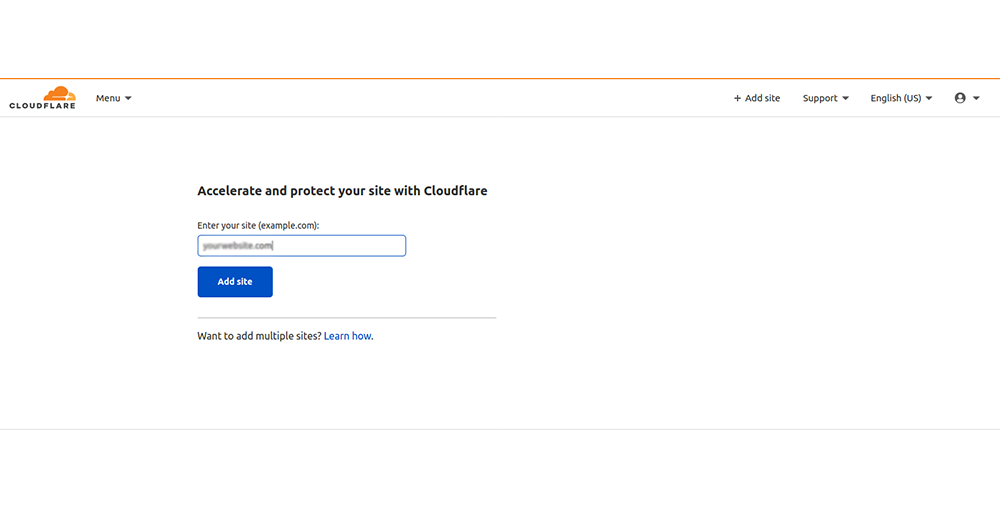
Step 3: Once you create your account, the next step will be adding your website. Enter the URL of your website, and click on the Add Site option.
Step 4: In the next step, you will see that the system will ask you to choose Cloudflare’s subscription plan. Here, we are using the free one.
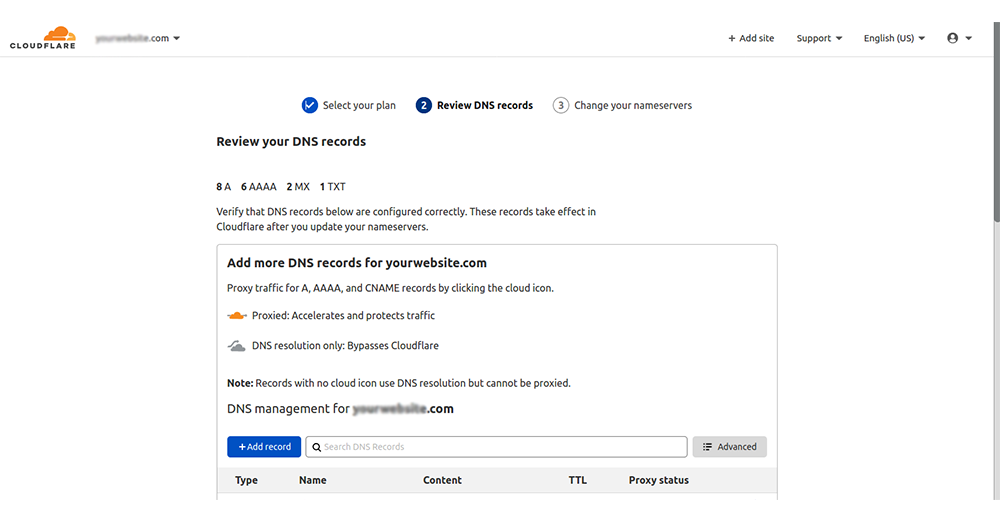
Step 5: After selecting and confirming the subscription plan, the site will scan your DNS record. Click on the Continue button to receive the new nameservers.
Step 6: In the last step, replace your existing nameservers with the new ones you just received from Cloudflare. Click on the Continue button to complete the process.
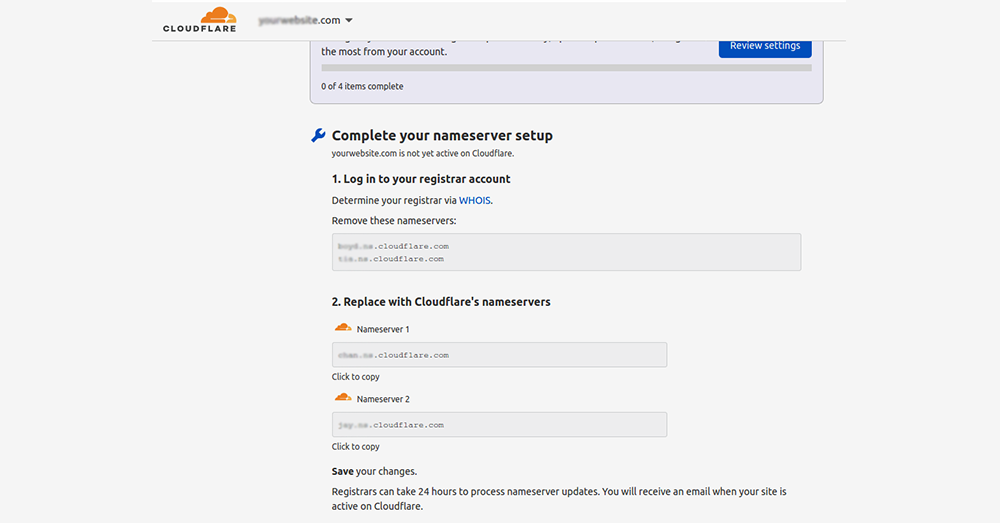
It can take up to 24 hours to process the changes, and once it’s done, you will see the status as ‘Activated.’ Now, Cloudflare will deliver the content of your WordPress website from its servers. If you need to get a detailed view of how to set up CDN using the Cloudflare WordPress plugin or Cloudflare services, you can check out Cloudflare: One-step Solution for Optimizing Your WordPress Website.
StackPath CDN setup process
The next in our list is StackPath (previously known as MaxCDN). It is one of the renowned names in the CDN industry known for its CDN and CDN plus website firewall plans. Both of these plans offer you the first month free trial period so that you can use and test the features and choose a plan as per your requirements. So, let’s start with the StackPath CDN integration tutorial for your WordPress website.
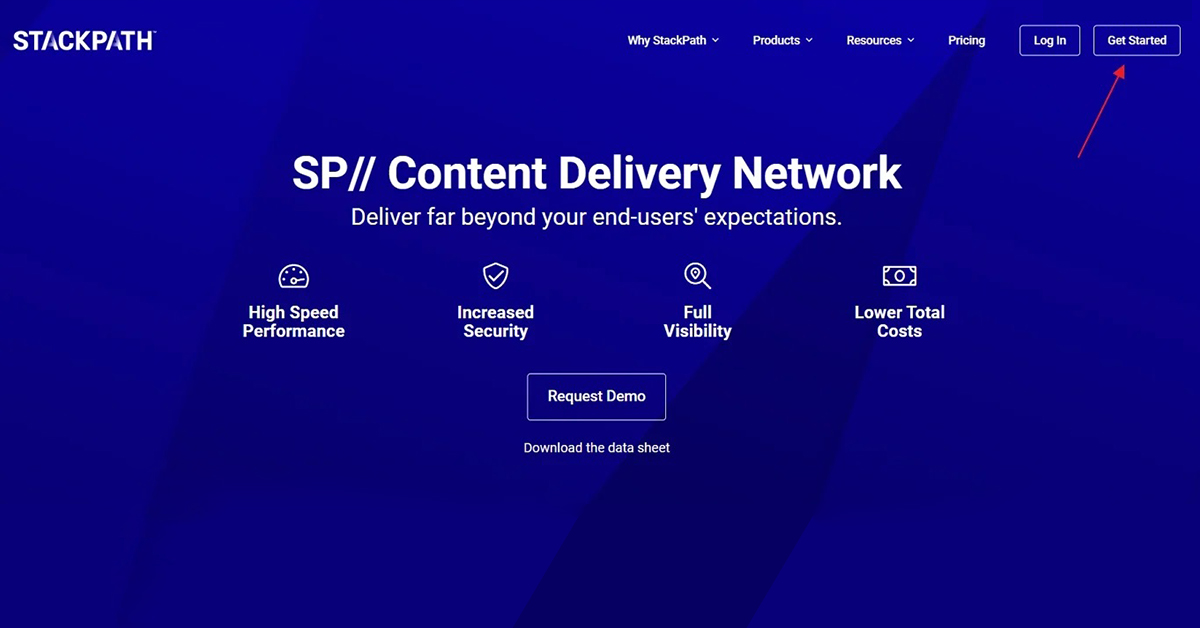
Step 1: Visit the official website of StackPath and click on the Get Started button present on the top-right corner of the screen.
Step 2: Now, to sign up, you can either enter an email address and password or use an existing Google, Facebook, or Github account.
Step 3: Next step, select Website & Applications Services.
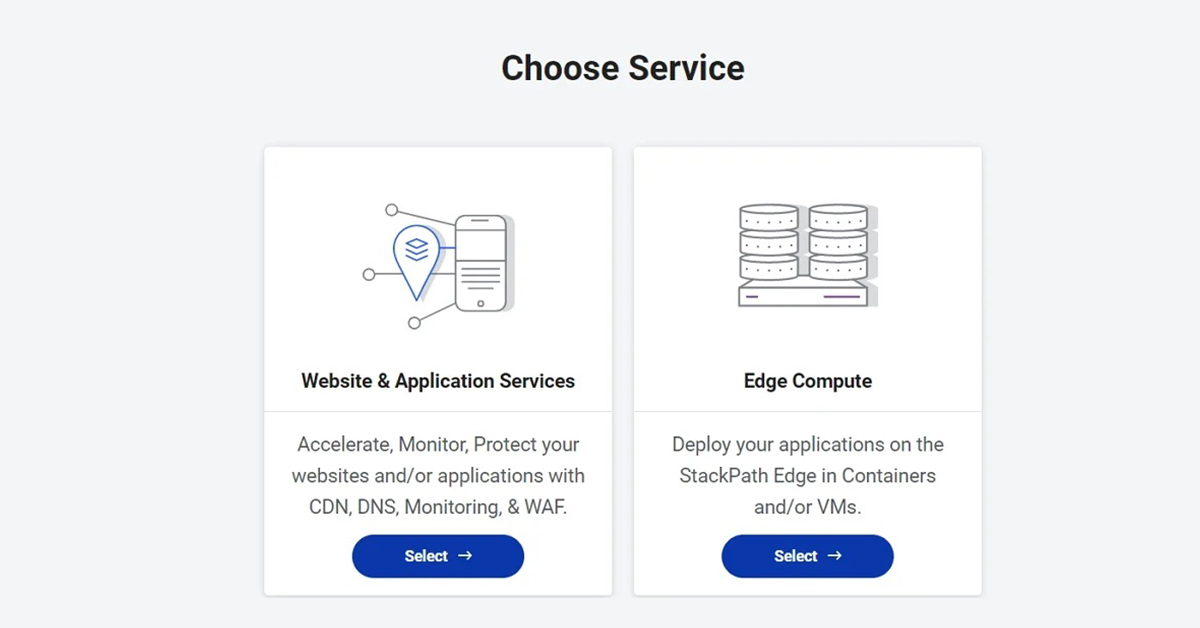
Step 4: On the next page, choose CDN and configure your payment method, followed by clicking on the Continue button.
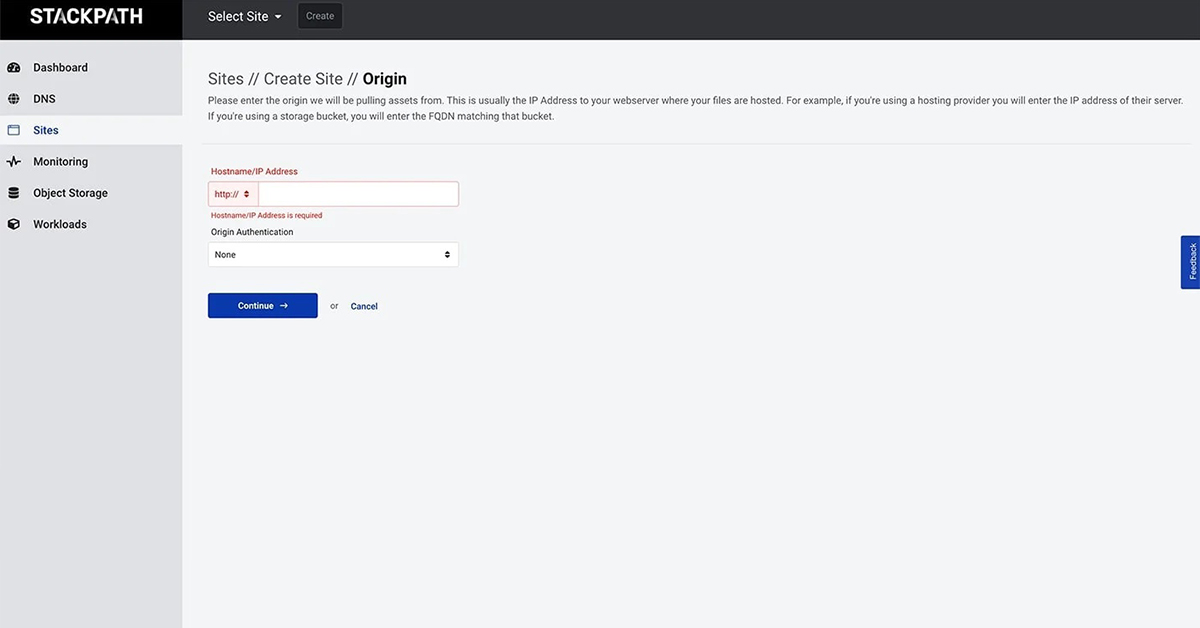
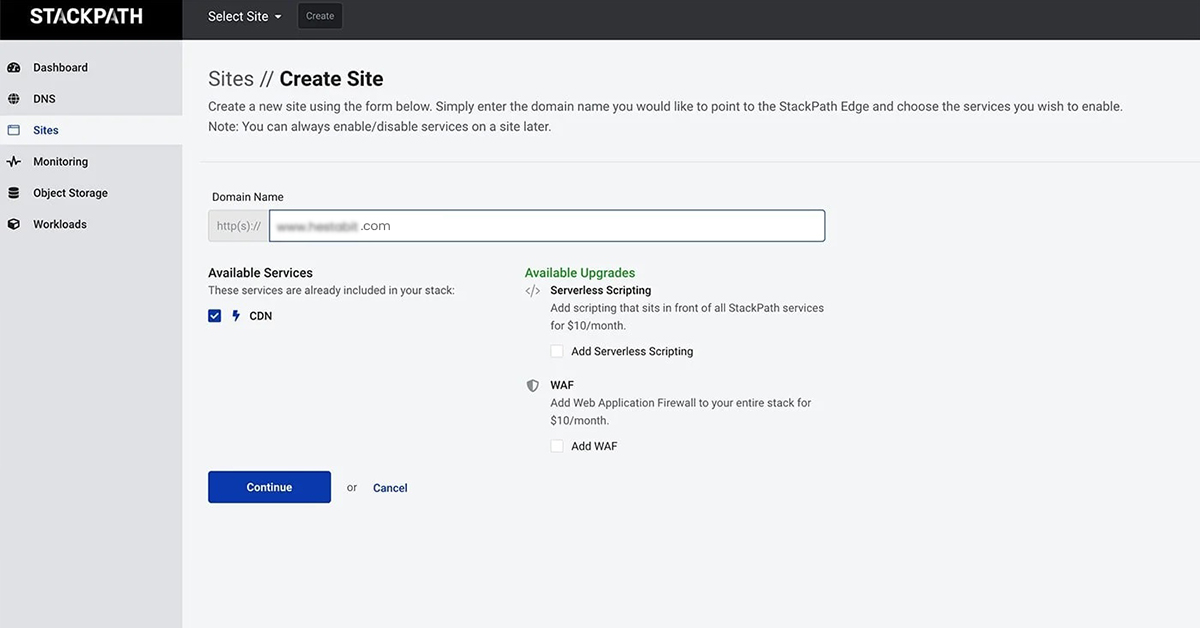
Step 5: Now, you will need to create a website using your domain name. After creating the site, click on the Continue button and fill in the IP address of your hosting server. This information usually is available in your cPanel.
Step 6: Lastly, update your DNS settings and mark them to the StackPath Network. You will need to make an A record and enter the information given by StackPath.
It can take up to 24 hours to complete the implementation of the changes. Therefore, do not forget to check your website to make sure everything is working as planned.
Sucuri CDN setup process
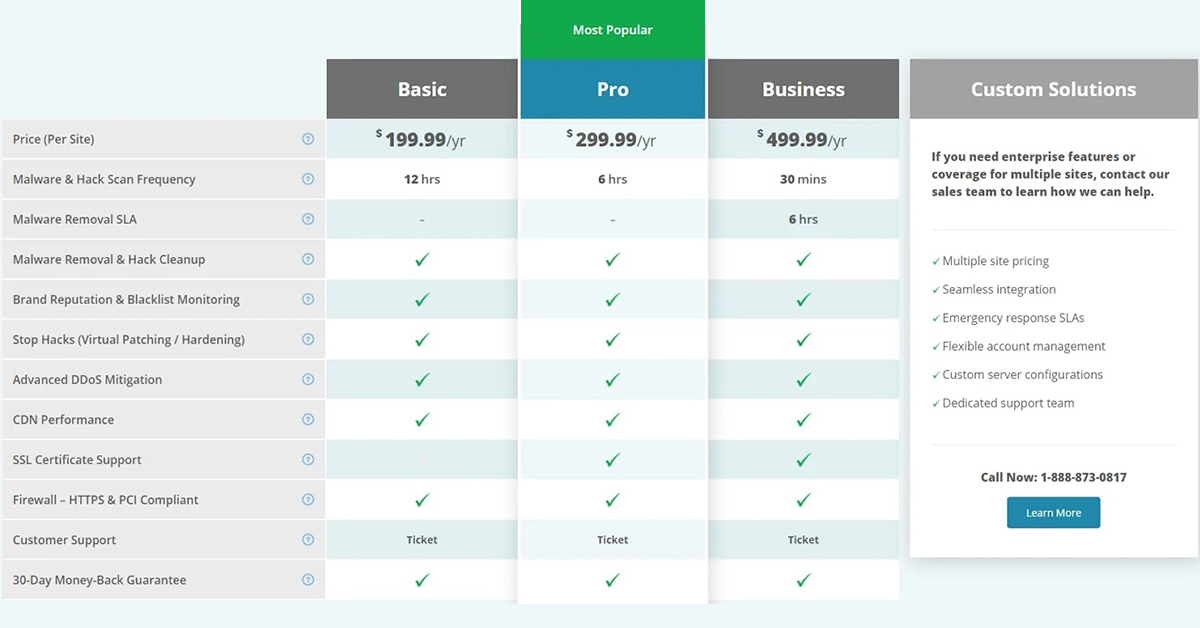
Sucuri Security is one of the most popular WordPress security plugins that protect your site from hackers and secures your business data. Along with security features, Sucuri can also prove to be beneficial when it comes to website optimization. The company also offers a standalone firewall that comes with in-build CDN services for your WordPress website. The basic plan starts at $199.99 per year, and all the plans come with a 30-day money-back guarantee. To know how to use CDN services from Sucuri, follow the steps mentioned below:
Step 1: Visit the official website of Sucuri and then go for the Website Firewall from the products dropdown menu. Now, you will need to choose the desired subscription plan. Here, we will go with the Basic plan.
Step 2: Now, create your account and enter your billing information.
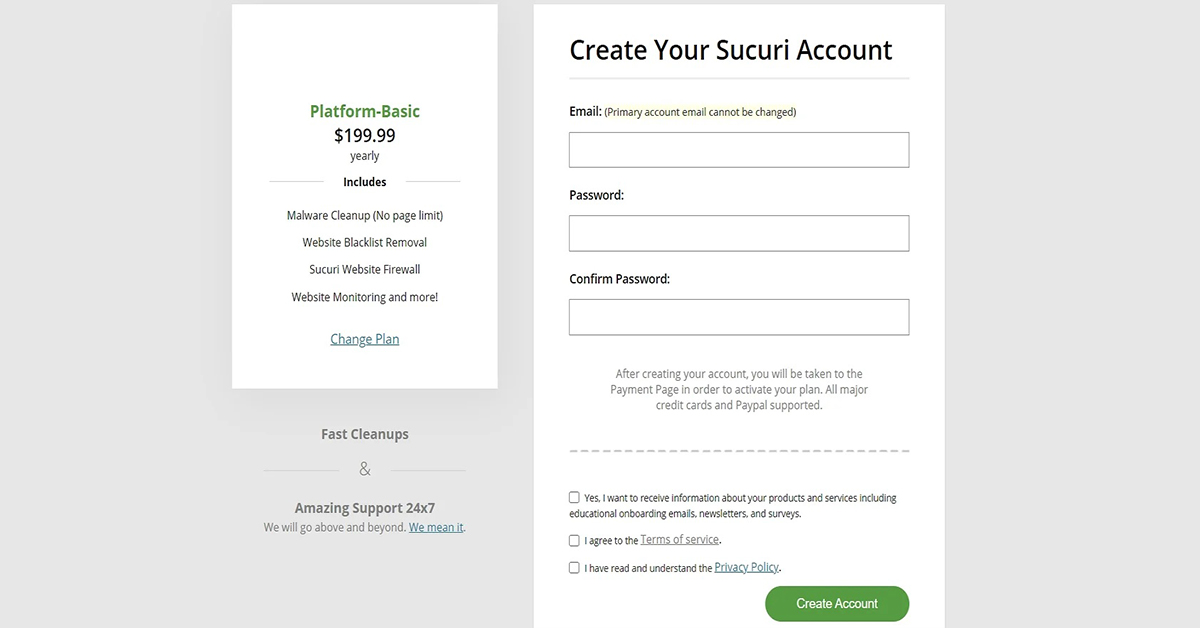
Step 3: With this, you can add your website by entering your domain name. Of all the three options available, choose the one saying, “I want to use Sucuri’s DNS servers.”
Step 4: The final step is to update your DNS information by adding an A record and heading it to Sucuri’s DNS servers.
It can take up to 48 hours to reflect the DNS changes in the Sucuri WordPress CDN setup. However, Sucuri claims that it can happen within six hours of updating your DNS records. Therefore, it is better to check your site to ensure that everything is perfect.
KeyCDN setup process
The last in our list of popular CDN service providers is KeyCDN, one of the most widely used and high-performing CDN. To check out their CDN services, you can go with the trial version they offer. Here are the steps to set up KeyCDN into your WordPress website.
Step 1: Head to the official website of KeyCDN and create an account. Once you complete your account, you will get a confirmation email from KeyCDN sent to your registered email account. On confirming the verification mail, you can access the dashboard easily.
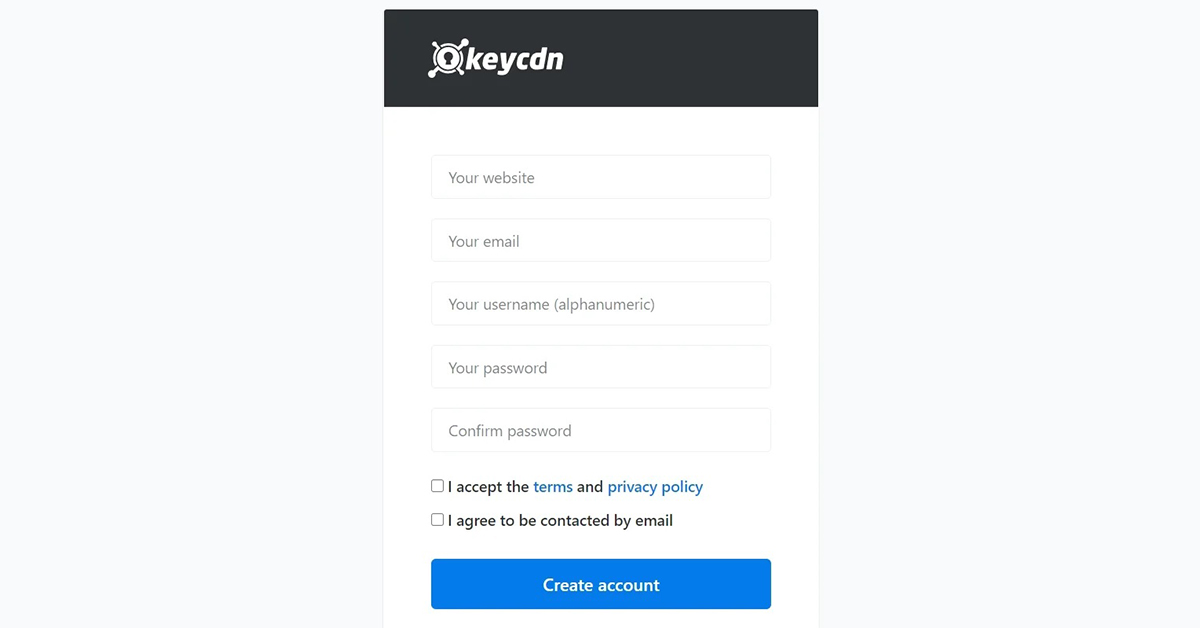
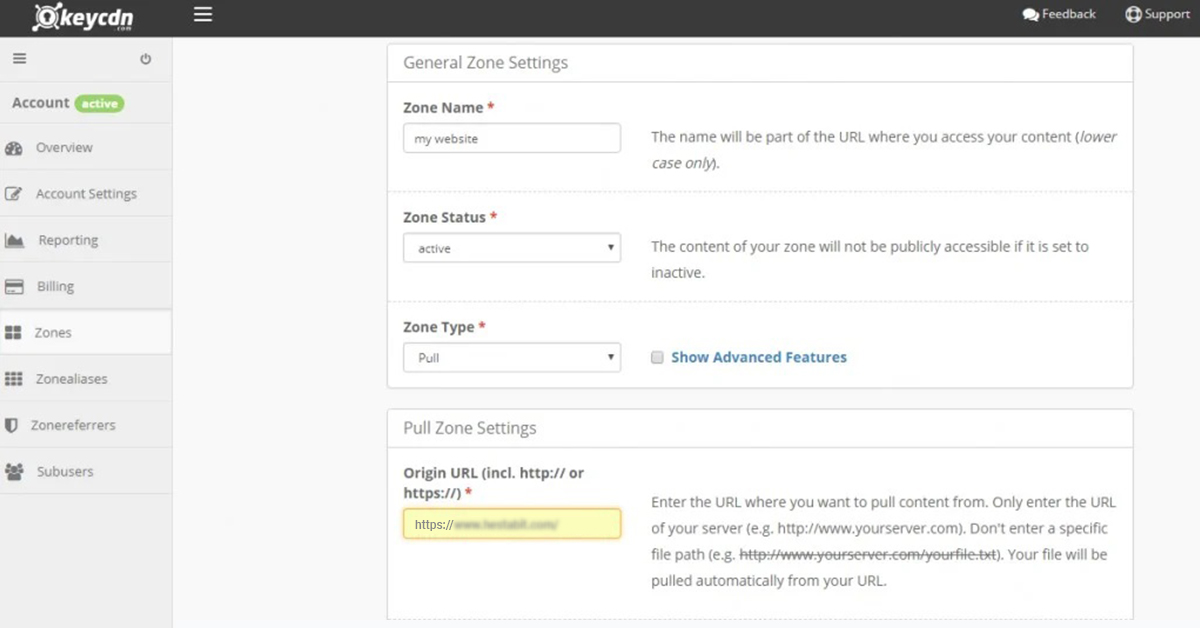
Step 2: On the dashboard, navigate to Zones from the menu available on the left side of the screen. Here you can add a zone for your WordPress site and generate a CDN URL.

Step 3: Tap on the save button to save the changes. It can take a few minutes to activate your zone, and once it is activated, you will see the status as Active.
Step 4: In the next step, you have to select the Purge option from the drop-down menu present besides the Manage option under Actions.
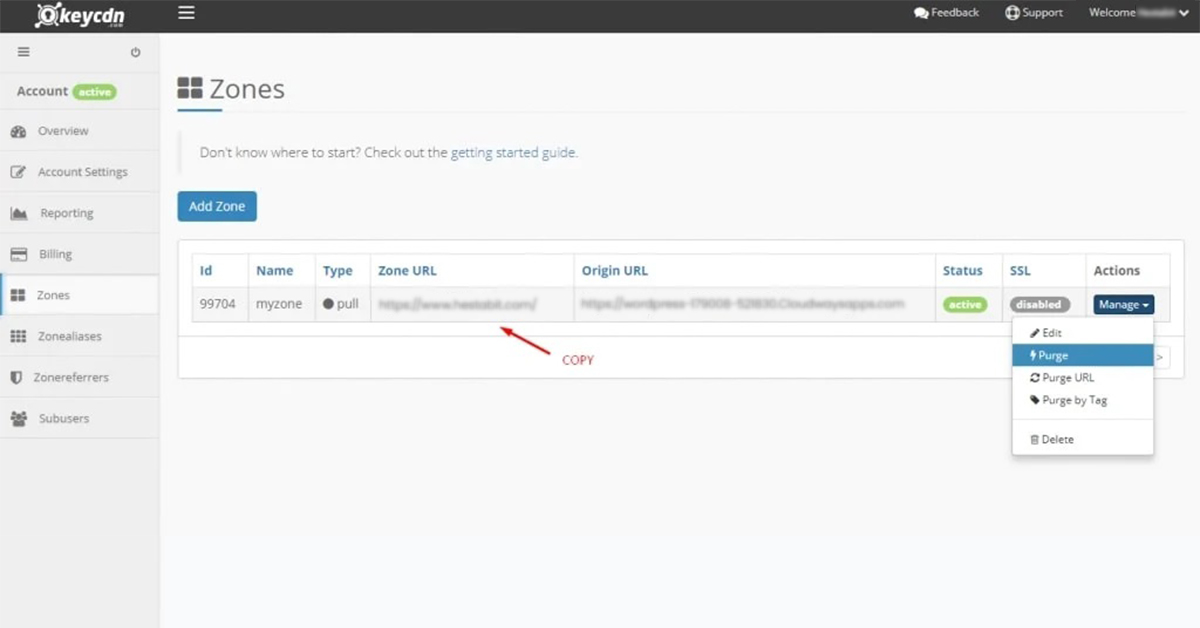
Step 5: Copy the zone URL and have it for the next step.
Installing the KeyCDN plugin
In the above steps, we have successfully generated a CDN service for our WordPress website. Now, we need to configure our WordPress website to coordinate with the CDN service properly. For this, you will require to install the Content Delivery Network WordPress plugin on your website. Here are the steps:
Step 6: Sign in to your WordPress dashboard and add a new plugin from the Plugins option. Search for Breeze – WordPress Cache Plugin.

Step 7: Once you finish installing the plugin, activate it and move to its settings. Now, click on the CDN tab and paste the copied zone URL (from Step 5).
Step 8: Finally, click on the Save Changes button to implement the CDN services.
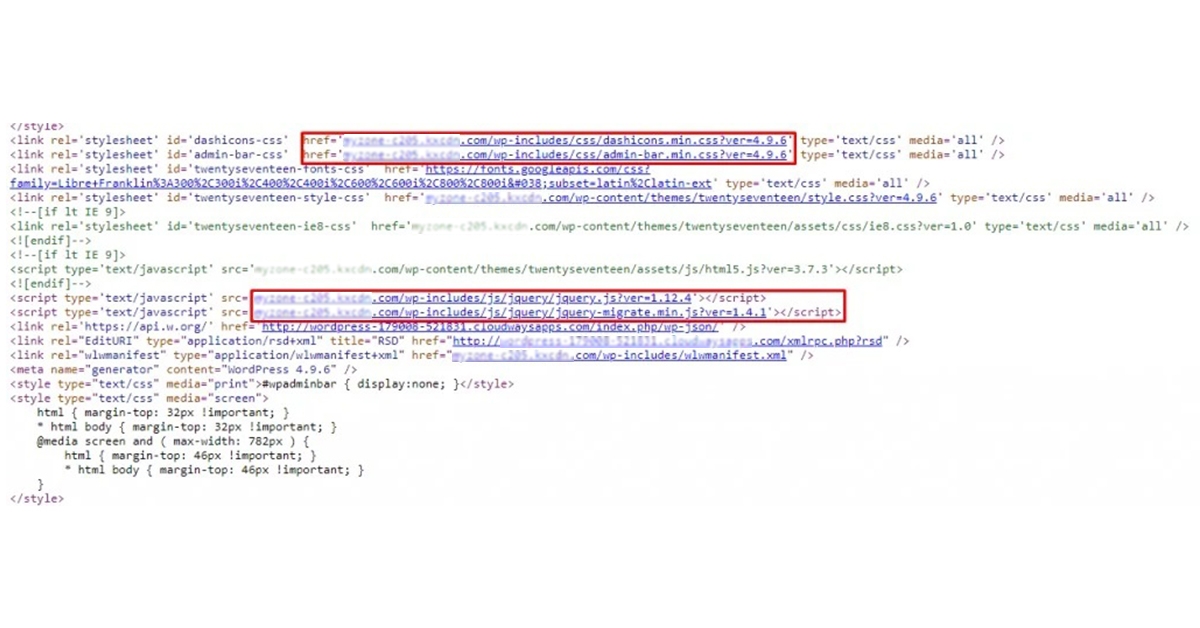
And that’s it. With this, you have successfully integrated CDN into your WordPress site. If you want to verify the integration process, you can simply browse your website in any browser and access the source code. On successful integration of WordPress CDN, you will see the downloaded files via KeyCDN servers.
Wrapping Up
This article has tried to touch upon all basic concepts related to CDN, its benefits, and how it operates. Moreover, we also looked at some of the most popular CDN service providers and how to integrate their services into your WordPress website. With this informational piece, you can understand how vital and beneficial it can be for your business websites. Since now you know how to set up CDN for your WordPress website, it is better to reach a CDN provider and integrate its services according to your business requirements.
