Developing a bang-on website is a significant part of climbing the success ladder in an entrepreneur’s life.
But you know what’s better?
It’s developing the same website in less time than expected!
And how is that possible? By easing out the development process to boost its efficiency.
Therefore, developers all around the world prefer migrating their WordPress website to a local server.
Copying a live WordPress site to a local host would provide you with ease to understand the intricacies of WordPress and test your website quickly and efficiently. It will also allow the hired developers to experiment with the exact data present on your live website.
In this write-up, we’ll provide insights on How to Move Live WordPress site to Localhost in a comfortable yet efficient way.
Why would one consider performing WordPress migration to a local server?
If you are a WordPress website owner already, there are high chances you want to make modifications to your website to keep it up to date and comply with your users’ evolving needs. Therefore, you would have to test out new themes and plugins in your WordPress site to keep your users entertained and looked to it.
But the area of concern here is how to test these modifications without hampering the juicer experience of the site?
Many entrepreneurs prefer to hire WordPress experts to import their WordPress site to a local server to test out new plugins, themes, and other testing related work to ensure seamless user experience.
This allows the developer to install and integrate the themes with the entire content while performing proper testing, with no site breaks. In fact, many developers prefer doing this to enhance their skill set and WordPress related knowledge.
Even though it is possible to test out all changes in the dummy content of WordPress, the actual data on the site will provide you with a better visual representation of how your site aesthetics will change once you install all the related themes and plugins into it.
The preparation involved in transferring the WordPress site to a new host:
The first step you need to take to carry out the WordPress migration is to ensure you have backed up the website securely and have the option of going back to where you were anytime you think it’s getting risky to carry out the migration.
Secondly, your developer would have to install a local server environment into the device/computer.
Here, WAMP can be used for Windows, and MAMP can be used for Apple devices. Once the environment is integrated and ready to use, you have to build a new database via phpMyAdmin.
You can easily visit the URLs mentioned below in the browser and launch phpMyAdmin.
http://localhost/phpmyadmin/
http://localhost:8080/phpmyadmin/
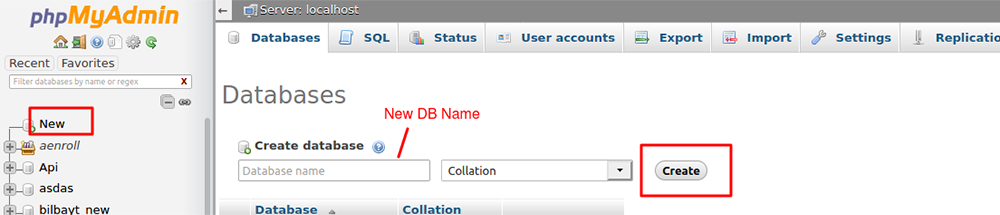
The next step would be to select the “Databases” tab and build a fresh database. This database would be required later when you would have to unpack the data of your live site.
Now, you are set to import your WordPress site to a local server.
There are two popular and easy methods to take this forward:
Method 1: Copying live WordPress site to localhost using Duplicator Plugins:
This is the easiest method of all time. Therefore, many developers recommend it to others.
The initial step is to install and start with the Duplicator plugin, which can be found on the official WordPress website.
The plugin allows a developer to quickly build a duplicate package of the entire website you own. You can use Duplicator to migrate your WordPress website to a whole new location and can also be utilized to create backups.
Upon installation and activation, the plugin will add a new “duplicator” menu in the sidebar of your WordPress admin panel. Clicking on the option will navigate you to the plugin’s packages screen.
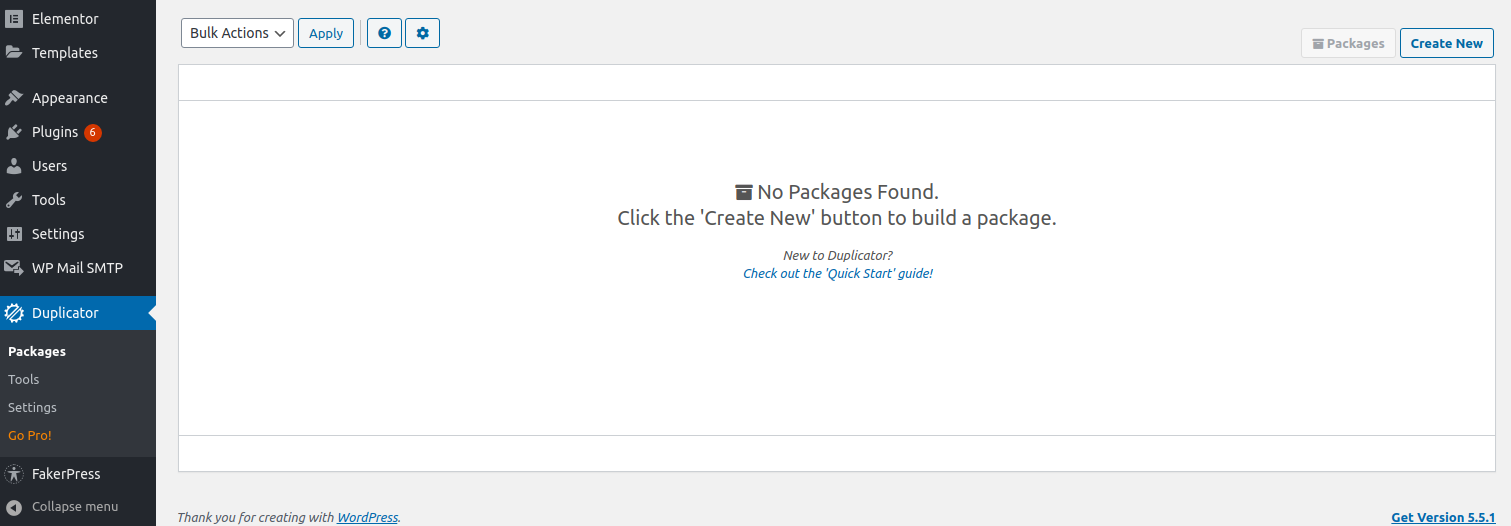
You would then have to select “create a new package” to build a new package and click on “next” to continue.
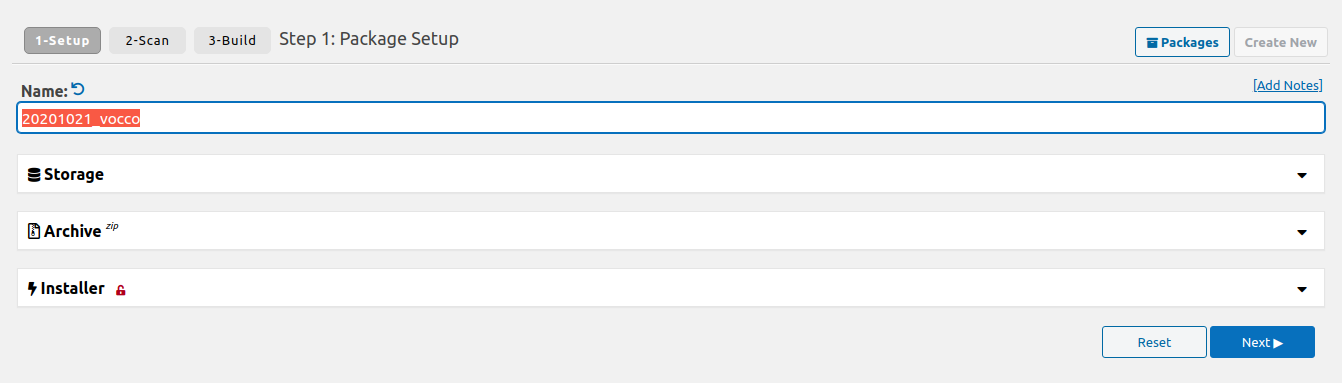

Next, Duplicator will scan your website while running some background checks, who’s summary will be displayed on your screen after the scanning process is over. If everything matches your requirements, you may proceed by clicking on the “build” button.
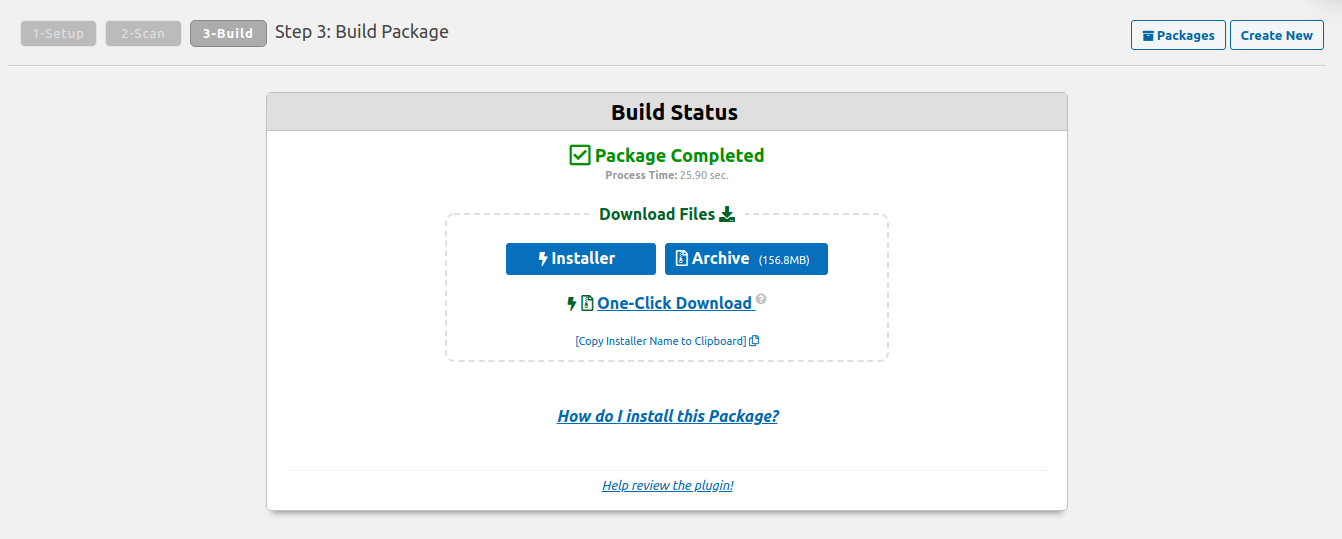
Now, a website package would be created by the plugin.
Once you are done, you will be able to locate an archive zip file containing all the data from your website and another installer file. These files are to be downloaded on your computer.
You can now hire developers to unpack these files and install them into the local server.
First, your developer would have to build a new folder in the local server’s root folder.
For instance, if you are using WAMP, the root folder would be C:\wamp\www\ folder; on the other hand, if you are using MAMP, it will be /Applications/MAMP/htdocs/ folder.
Within this folder, a developer can create new folders and assign each to the new website you wish to import or build on the localhost.
Later, you would have to open the created folder for your website and paste both the installer script and the zip file you downloaded before.
For running the installation further, your developer would have to open the installer.php in the web browser.
For example, if you are pasting both files in the folder names as /mylocalsite/, you can access them in the browser by visiting
http://localhost/mylocalsite/installer.php
Once you see the Duplicator installer script, click on “next” to proceed.
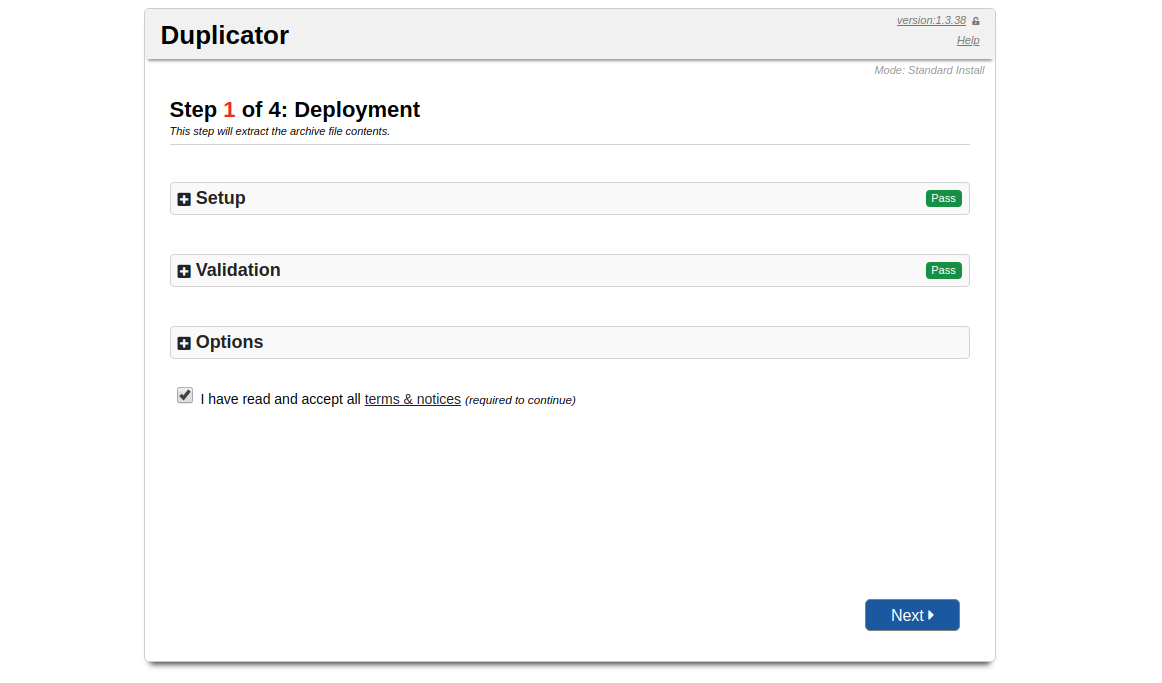
The plugin will then unpack the archived file and request you to integrate your local website’s database information. This database was created by you earlier.
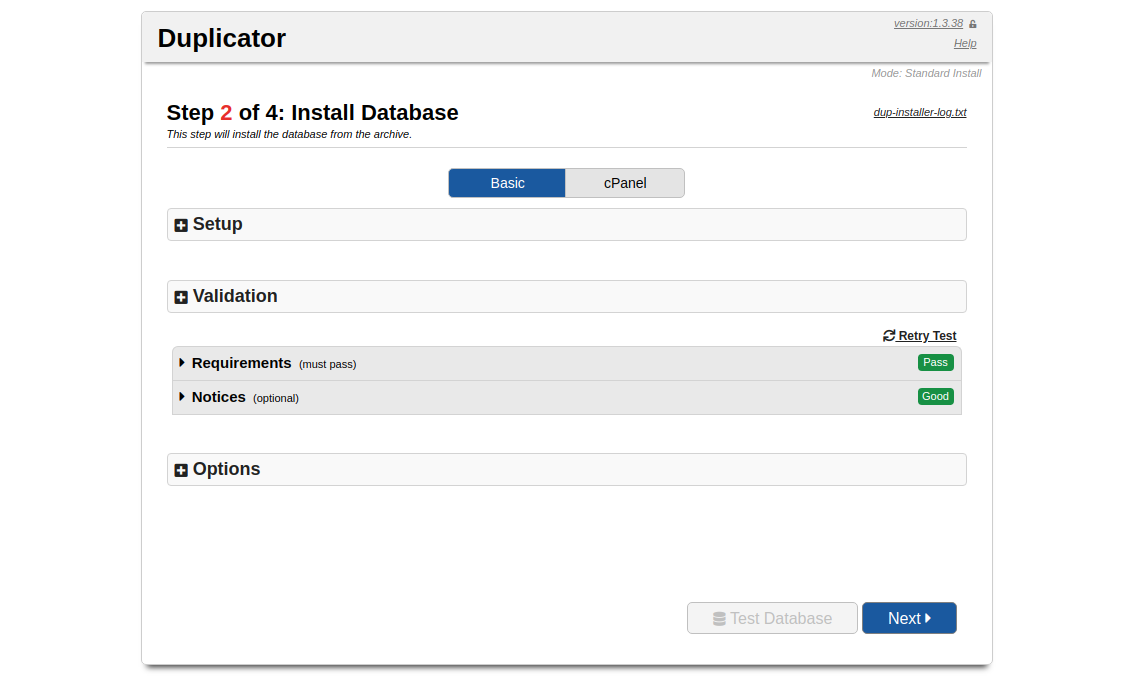
The server remains local in most cases, and the username associated with it is root. In many cases, the local server you have installed holds no password for the root file. Therefore it can be left blank.

At the page bottom, you will find “Test Database,” which can be used to ensure your database holds relevant information only.

If all’s good, proceed with “Next.”
The plugin will then perform WordPress migration of the database. It will then ask you to cross-check the new site information detected by it automatically. Click on “next” if all is as per your wish.
Duplicator will set everything up now and provide you with the option of logging into your local website. You can log in with the same username and password you use for your website.
Well, there’s nothing more to do here. You have now successfully transferred your WordPress site to a new host.
Read More: Convert WordPress Site Into a Mobile App
Method 2: Import the WordPress site to a local server manually:
In case you don’t wish to go the plugin-way, you can always hire WordPress experts and migrate your WordPress site manually to a local server.
Remember, the first step in no matter which way you choose, should be to create a reliable backup of your existing website to avoid any haywire occurrence.
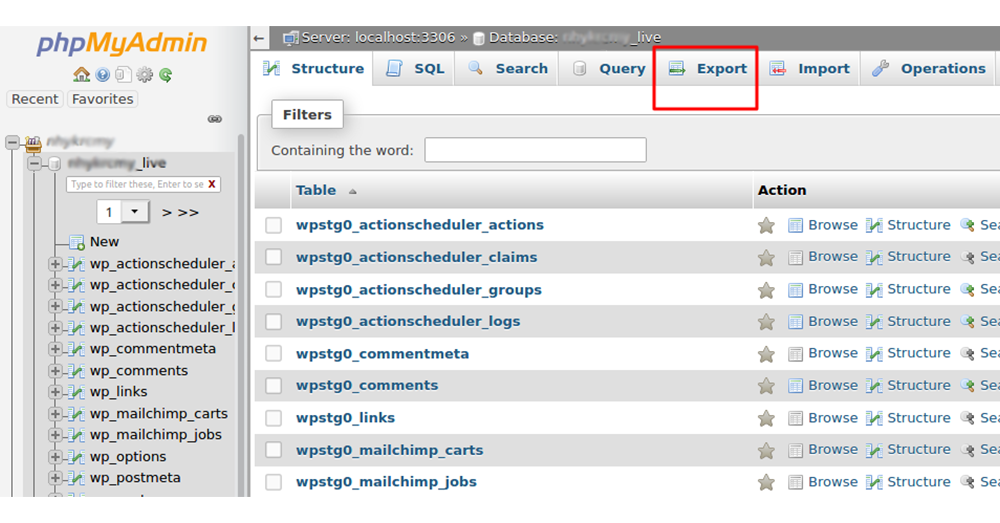
Step 1: Export the database of your live site:
To export your live website’s database, your developer would have to log into the dashboard of cPanel and select phpMyAdmin.

Note: Here, we will talk about the Bluehost dashboard (just as an example).
Inside the phpMyAdmin, you would have to select the WordPress database you are aiming to export and then click on the tab on the top that says “export.”
The phpMyAdmin will ask your choice between the custom or quick export method. Our recommendation would be to choose the custom method and use zip for the compression method.
Sometimes tables can be created within the database via WordPress plugins. However, if you opt for not going with the plugin, the custom method will allow those tables’ execution.
Leave the other options as it is, and select the “go” option to download the zip file of your database backup.
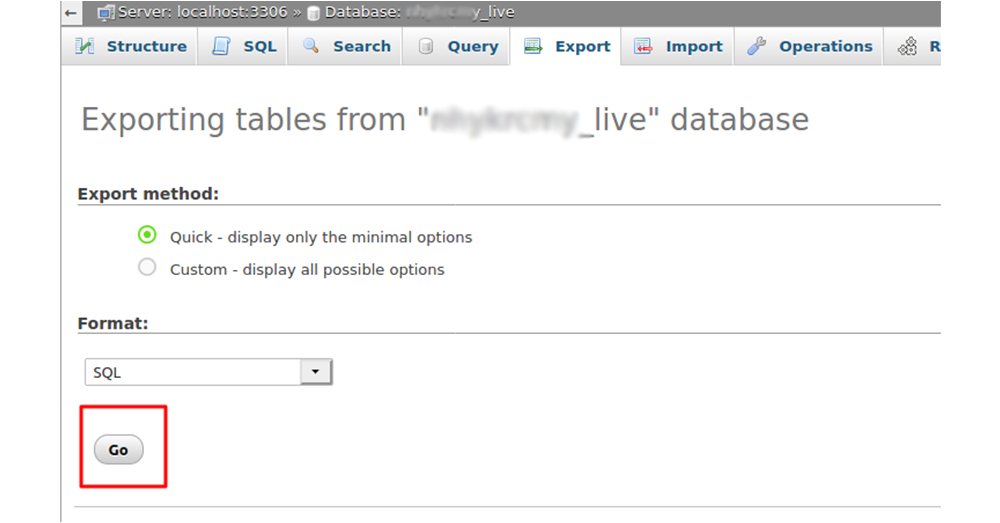
The files will now be downloaded via the phpMyAdmin.
Read More: Easiest Tutorial To Dockering Your WordPress With Nginx
Step 2: Download every WordPress file:
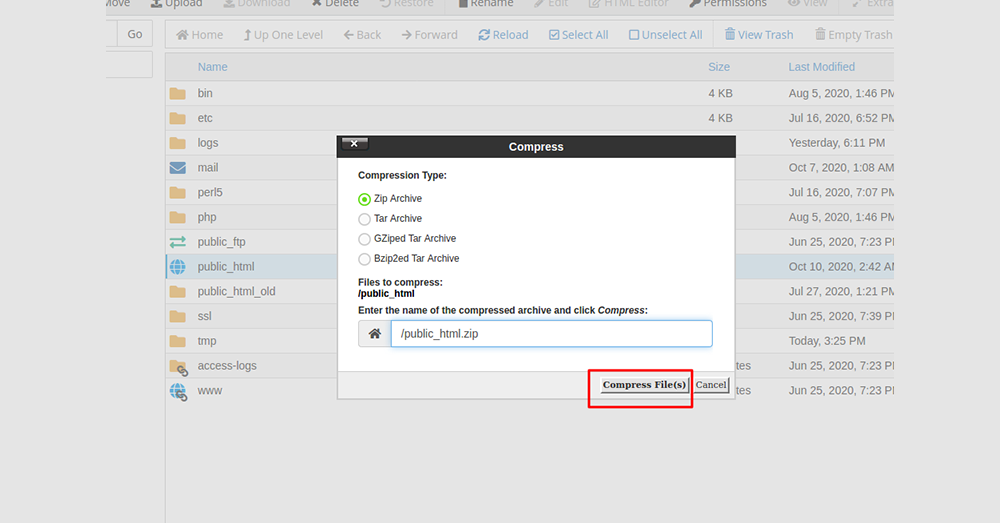
The next step would be to download all the files of your WordPress site, which can be done by selecting the folder containing your files and creating a compressed zip file as follows.
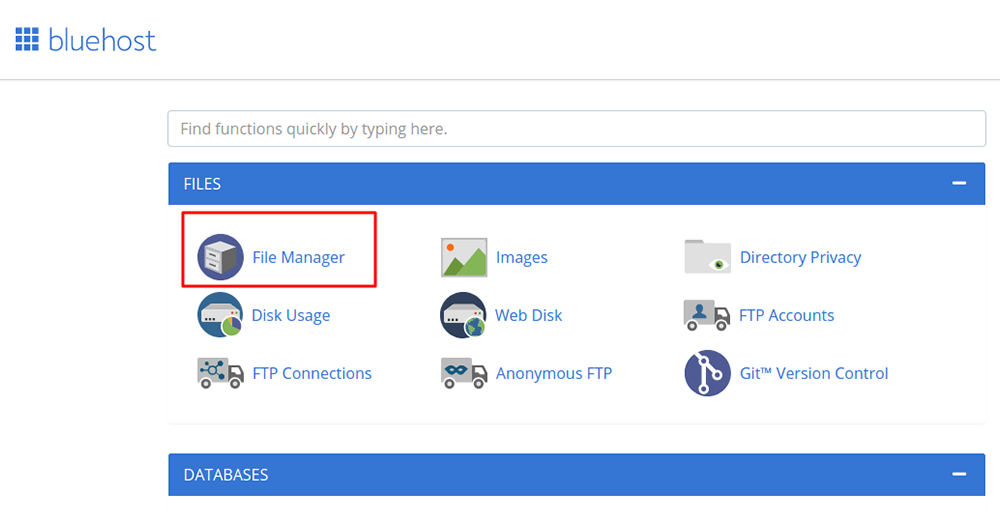
Once the zip file is created, select the zip file and click on download. This will download the zip file containing all your code files.


Step 3: Import the files to a local server:
After you have successfully downloaded the WordPress files, it would help you create a folder on the local server to import the WordPress site.
If you are using MAMP, your developer would have to create a folder inside the /Applications/MAMP/htdocs/ folder, and if you are a WAMP user, you will make the folder inside C:\wamp\www\ folder for your localhost.
After that, you can simply copy and paste the downloaded compressed zip of your website into the folder and decompress them.
The next step would be importing the database; this can be done just by opening the admin panel in the local server by clicking on the URL:
http://localhost/phpmyadmin/
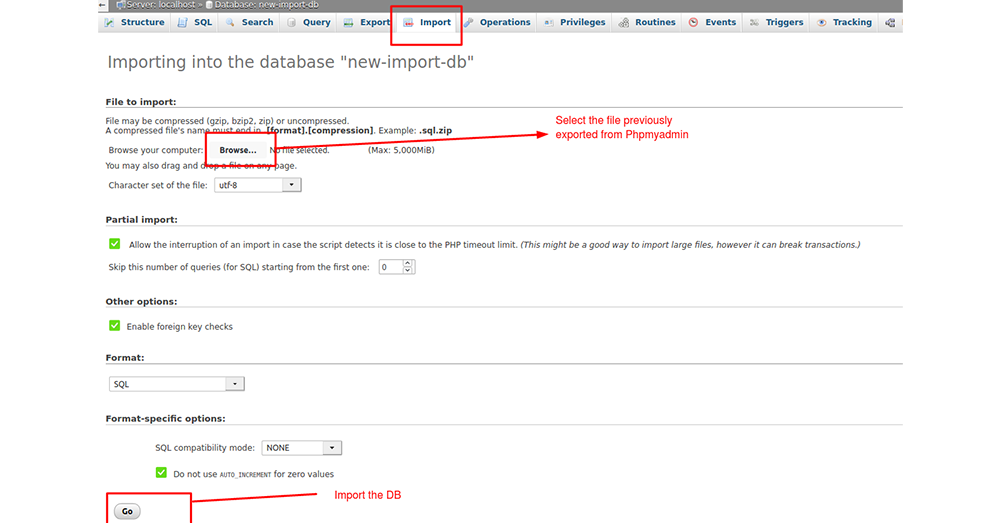
Since the database is already built earlier, now you should select it and then select the import tab located at the top.
Or, You can create a new database and import the database which we exported from the live website earlier.
Select the “choose file button” to upload the database export file downloaded by your developer in the initial phase of copying the live WordPress site to the localhost. Select the “go” button (located at the bottom of the page) after it.
phpMyAdmin will proceed further by unzipping and importing the WordPress database.
Now that you have set up the entire database, you would have to update the URLs inside your live WordPress site database.
This can be done via an SQL query in phpMyAdmin. Ensure the selection of your local website’s database and then select SQL.
The query will select your live site’s URL references and replace them with the URL of the localhost.
UPDATE wp_posts SET guid = replace(guid, ‘http://olddomain.com’, ‘http://newdomain.com’);
UPDATE wp_posts SET post_content = replace(post_content, ‘http://olddomain.com’, ‘http://newdomain.com’);
UPDATE wp_links SET link_url = replace(link_url, ‘http://olddomain.com’, ‘http://newdomain.com’);
UPDATE wp_links SET link_image = replace(link_image, ‘http://olddomain.com’, ‘http://newdomain.com’);
UPDATE wp_postmeta SET meta_value = replace(meta_value, ‘http://olddomain.com’, ‘http://newdomain.com’);
UPDATE wp_usermeta SET meta_value = replace(meta_value, ‘http://olddomain.com’, ‘http://newdomain.com’);
Read More: How to Update PHP Version in WordPress
Step 4: Update the wp-config.php file:
The final step would be to update the wp-config.php file of your local site. This site hosts your WordPress site setting, including the information on how to connect to the database.
All you have to do is just navigate to the folder where WordPress is installed on the local server and then go to wp-config.php file in any text editor such as notepad.
Replace the name of the database with the one built by your earlier using phpMyAdmin.
/** The name of the database for WordPress */
define(‘DB_NAME’, ‘database_name_here’);
/** MySQL database username */
define(‘DB_USER’, ‘username_here’);
/** MySQL database password */
define(‘DB_PASSWORD’, ‘password_here’);
Then, replace the database’s username with the local MySQL username you have (e.g., root); if you have set a password for the root, enter that. Otherwise, you can also leave it empty and just save up all your changes.
You can now visit your live website in the local browser!
Kudos for the hard work.
Parting Thoughts:
That is all. You have now found the answer to how to create a local copy of a live WordPress site. There is nothing more for you to know. You can simply hire WordPress experts and easily carry forward with the migration task with professional help, in less hassle.
We hope this write-up has worked as a guide for you to test out all your changes in the local server, and now you can provide a more flawless and updated user experience via your modified website.